How to Create Custom Salesforce List Views
Learn how to create custom Salesforce list views by reading our detailed guide.
What are Salesforce list views?
List views are tools in Salesforce that define a set of search conditions to view a specific segment of data. This feature lets you see a particular set of records in an object by applying filters.
The list view provides a list of desired records, as opposed to the Salesforce Kanban view, which shows a graphical representation of the records. The list view is more comprehensive for analysis whereas the Kanban view helps move deals forward and manage the Salesforce pipeline.
With Salesforce list views, you can sort data by one or more fields and view only the segment that you require to build a report. You can filter a list of records like contacts, custom objects, accounts, and so on.
This saves time and effort that would otherwise have been spent sifting through large volumes of data to find the relevant information.
While list views provide a way to focus on a specific data set, they also enable you to identify gaps in the data.
How to create list views in Salesforce
Salesforce Classic vs. Lightning
Salesforce’s customer relationship management (CRM) software has two interfaces: Classic and Lightning. Salesforce Classic is the traditional tried-and-trusted Salesforce formula, whereas Lightning is an updated version with a new and improved user interface.
Lightning also has features like an activity timeline and workplace page layouts. If you can see the App Launcher icon on top at the left side of the navigation bar, you are in Lightning; otherwise, you are experiencing Salesforce Classic.
You can create a list view in both interfaces to segment the data into a set of contacts, documents, or other records.
How to set up a list view in Salesforce Lightning
To create a Salesforce custom list view in the Classic interface, you need user permissions such as Read on the record type included in the list and Create and Customize List Views. To create, edit, and delete custom public list views, you need Manage Public List Views permission.
Now, let us view the steps required to create a custom list view in Salesforce Lightning.
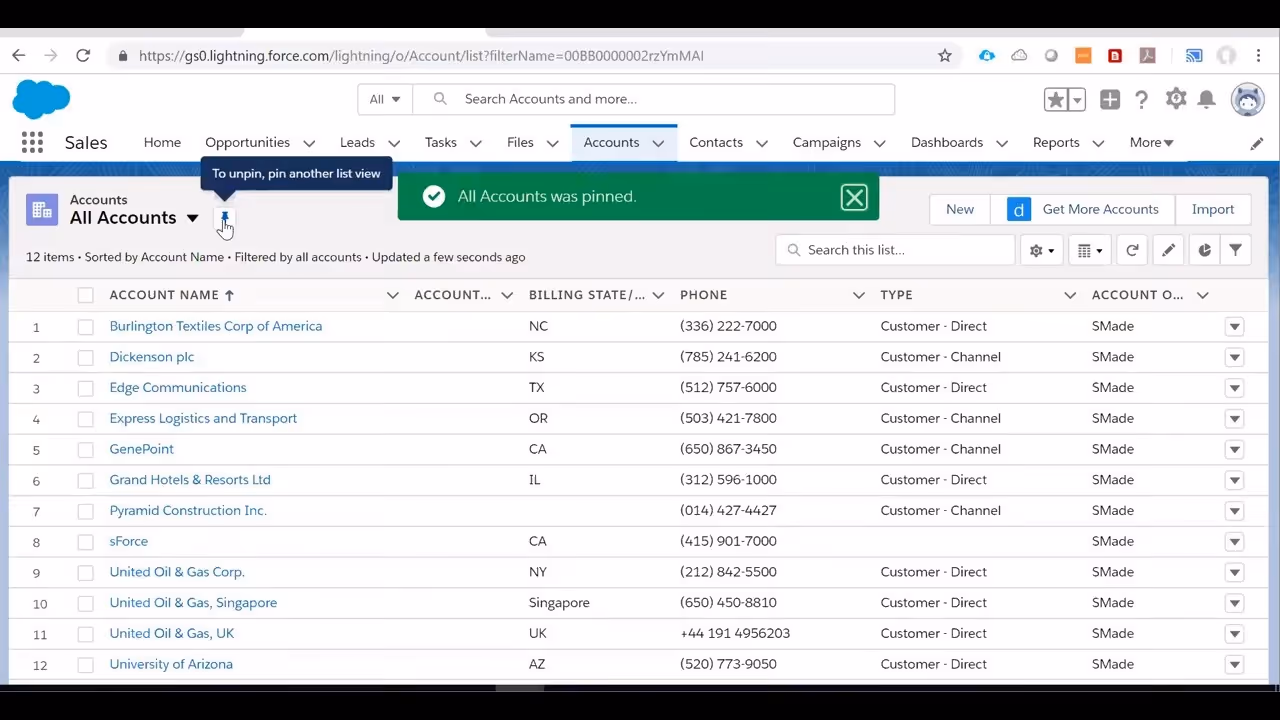
- In the top-navigation bar, select the desired objective type for which you want to create a list view. In our example, we select 'Accounts'.
- From the list view controls menu (cogwheel icon) on the right-hand side next to 'Search this list...', select 'New'.
- Add a name for the list. For instance, you can name the list 'Channel Customers'.
- You are required to add an API name. It must begin with a letter and must only use alphanumeric characters and underscores. It cannot end with an underscore or contain two consecutive underscores. In our example, we go for 'channel_customers'.
- You get an option to decide who can view the list. Here, we’re selecting the option 'All users can see this list view'.
- Click 'Save'.
How to customize list views in Salesforce
Now that you have created a custom list view with filters, you should learn how to make further customizations in the list view. You can customize views to add or remove columns, apply more fields, etc.
- Go to list view controls and select the option Select Fields to Display.
- You can remove fields out of visibility or add new fields to be viewed. For instance, you remove Account Site, Account Owner Alias, and Phone, and add the fields Industry and Customer Priority.
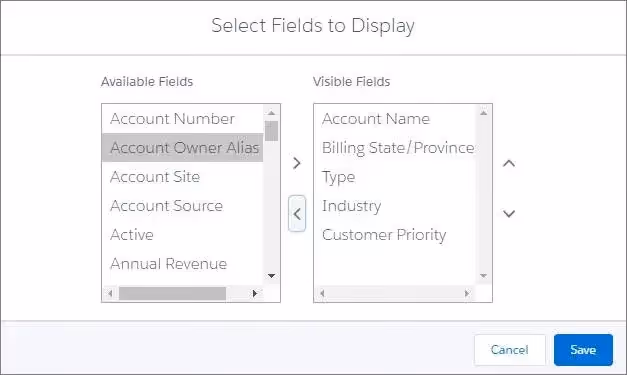
- Click Save to save your changes.
- You can change the sort order of the contents. If the arrow in the Account Name column header is upward, the column is sorted alphanumerically from the first. If the arrow is pointed downward, the column is sorted starting from the last record.
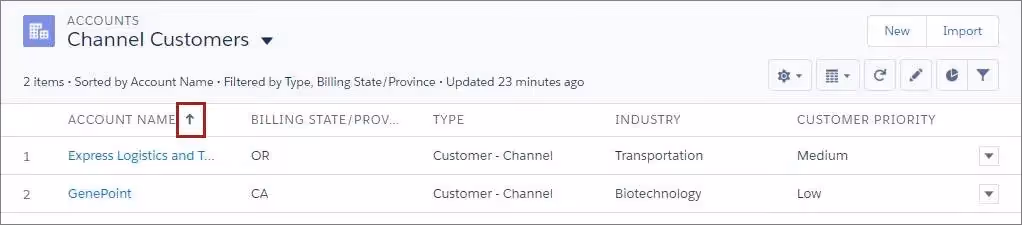
If the record shows the pencil icon when you hover your cursor over the cell, it means the record is editable.
If the record shows a lock icon when you hover the cursor over it, it means the cell is not editable.
How to filter list views in Salesforce
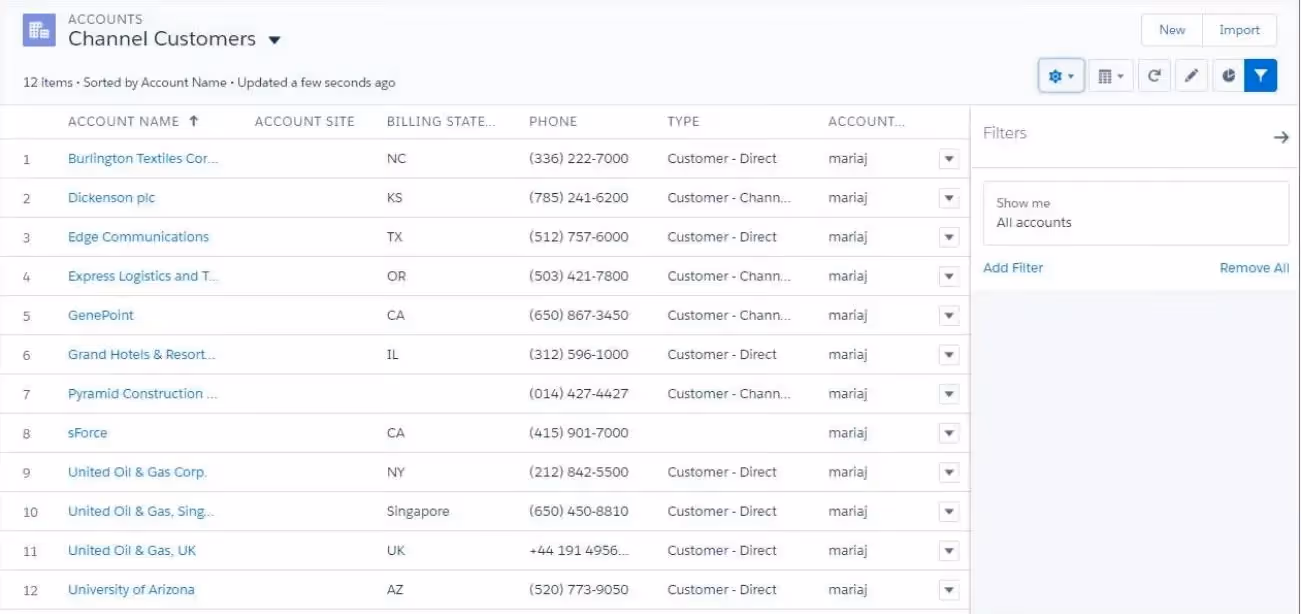
Initially, the list view will show all the accounts without any filters. You can add and edit list filters at this stage through the Filters panel.
- To add filters and narrow down the list data, click the filter icon to open or collapse the filter pane.
- Go to the Field dropdown menu and select the field you want to filter, for instance, type.
- Select the desired operator and value you want to filter for. For example , we want to filter records that equal the type 'Customer - Channel'.
- Then, click Done and Save.
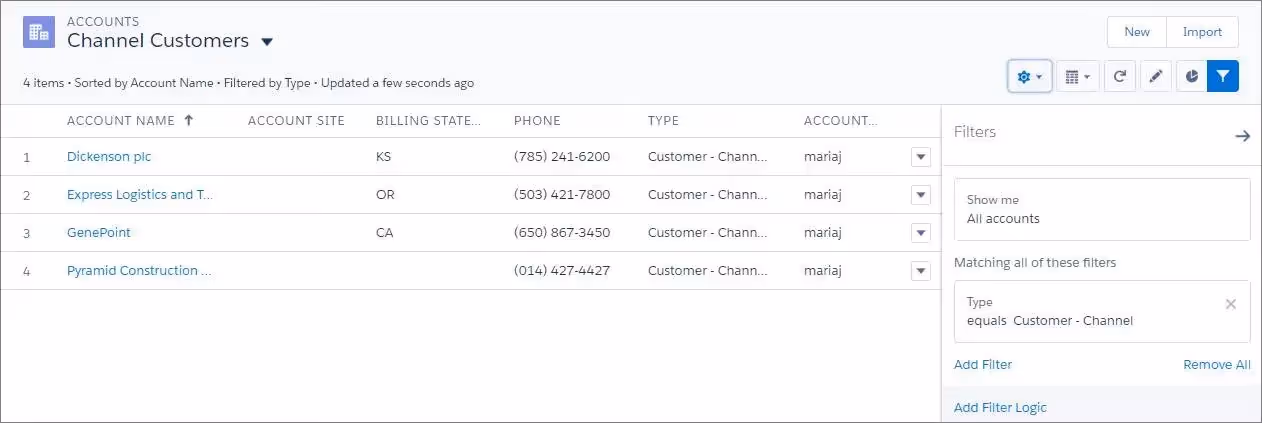
The new list view will appear in the list view dropdown (top left chevron next to your list name) for you to access later.
How to optimize Salesforce list views
Salesforce list views need some optimization as it becomes difficult to sort data within a display of thousands of records. By applying the steps below, we can make Salesforce load quicker and optimize our workflows for higher productivity.
- Use the EQUALS operator instead of CONTAINS, and AND statement instead of OR, to return a lesser number of records.
- Use date filters, like start and end date.
- Provide record access only to relevant roles or teams.
- Only select the fields that are crucial to be displayed.
- Segment Salesforce users into groups based on specific requirements and use cases for better analysis.
- Use the Pinned List View to highlight a specific view. Click the pin icon next to the name of your list view to pin it.
- Use the Favorites view by clicking the star next to the list name. Favorites work like bookmarks and let you access important lists and records without having to search every time.
How to share Salesforce list views
You can only share a list view if you have the Manage List View Permission. The sharing settings can be accessed through the cogwheel icon.
- List views are visible to all Experience Cloud site users with licenses for Customer Community Plus, Partner Community, Lightning Platform Starter, and Lightning Platform Plus licenses if you enable the Visible to all users setting.
- Enable the Visible to certain groups of users setting if you want to restrict who can view the lists. You can then share the view with the All Internal Users group or select the internal groups and roles that can view this list.
- You can also create custom views with information for site users and share them by selecting the All Customer Portal Users group or specifying a set of users and roles.
- You can change or update the sharing settings later.
How to create Salesforce list view charts
To see specific list view data, you can create charts. Let’s explore the Opportunities tab here.
- Click the Opportunities tab from the Sales app and select All Opportunities for list view.
- Click the chart icon.
- Click the cogwheel icon in the charts panel and select New Chart.
- Add a name for the chart and add required parameters. For instance, we take 'Pipeline Total Value' and want to display it as a donut chart.
- Click Save.

The gear icon in the lower right corner of the chart enables a change of chart type (e.g., vertical bar chart, donut chart, horizontal bar chart, etc.) and the creation of entirely new charts.
While List View Charts provide a quick overview of relevant high-level numbers, we dedicated an entire article to which other Salesforce KPIs you should track.
Wrap up
Salesforce offers the List View feature to make it easier for you to deal with large data. Whether you are performing analytics, creating a report, or viewing for reference, list views and their customization features can make your job easier.