6 Best Practices for Salesforce Opportunity Management

It’s crucial for sales teams to update opportunities regularly to ensure sales success. However, this can be cumbersome to do in Salesforce, so sales reps don’t update opportunities consistently.
In this guide, we share six best practices for Salesforce opportunity management that can help you ensure that your sales pipeline stays clean, all opportunities get updated regularly, and that your forecasts are on point.
Leads vs. opportunities
First, let’s define what leads and opportunities are. Are they the same?
A lead is an individual or a business that's at the top of the sales funnel and hasn't yet been qualified by the sales team. For example, they might have downloaded a piece of content like a white paper or an eBook, registered for a webinar, or been contacted by a sales rep via a cold call.
On the other hand, an opportunity is a qualified prospect that has shown interest in your solution and has already moved down the sales pipeline.
In short, leads and opportunities are at different sales stages in your funnel.
Top 6 best practices for Salesforce opportunity management
Ready to improve your opportunity management process? Keep on reading to learn our six best practices for Salesforce opportunity management.
1. Define opportunity stages
The first step in tracking and organizing opportunities is to identify and define the various opportunity stages. This will help you understand what steps a prospect needs to take to become a customer. Keep in mind that it’s not a linear path, and the number of stages differs from company to company.
By default, there are nine opportunity stages in Salesforce. These include:
- Prospecting
- Qualification
- Needs Analysis
- Value Proposition Id.
- Decision Makers
- Perception Analysis
- Proposal/Price Quote
- Negotiation/Review
- Closed
- Closed Won
- Closed Lost
Apart from the default ones, you can also set up custom opportunity stages to match your actual sales process. To do so, go to Setup > Object Manager > Opportunity Object > Fields & Relationships > Stage.
Click on New.
Name the stage, choose a type (Open, Closed/won, or Closed/lost), and add a short description (optional) and a default probability.
You’ll also need to choose a forecast category (Omitted, Pipeline, Best Case, Commit, or Closed).
2. Incentivize your team to update opportunities
Outdated sales opportunities are a common problem for sales teams. The consequences? Lack of accurate data and inconsistencies can cost companies millions of dollars.
According to a Salesforce study, businesses can lose up to $700 billion annually due to poor data in their CRM systems. This means that you must implement strategies and processes to minimize data errors and ensure proper opportunity management.
You can use incentives to nudge your sales team to update opportunities on a regular basis. For example, you could reward reps who fill their pipeline by a specific date or correctly fill out all opportunity fields consistently.
Additionally, you can implement a pipeline hygiene score to set standards to which sales reps should adhere.
3. Automate sales activity tracking
A great way to ensure all your opportunities are updated consistently is to automate sales activity tracking.
A solution like Weflow can help you track your sales team’s tasks, notes, and emails, and sync these to Salesforce automatically.
That way, all relevant sales data ends up in your customer relationship management system. This, in turn, saves time for your sales team, improves CRM data hygiene, prevents deals from falling through, and improves sales forecasting accuracy.
4. Use Salesforce Path
Salesforce Path visualizes records’ progress in a chevron diagram. It guides sales reps through your sales process, from initial prospecting to a close. At each step of a path, you can include tips, hints, links, and other best practices.
Salesforce offers paths for the following objects:
- Accounts
- Assets
- Campaigns
- Cases
- Contacts
- Contracts
- Fulfillment orders
- Leads
- Opportunities
- Orders
- Product service campaigns
- Product service campaign items
- Quotes
- Service appointments
- Service contracts
- Work orders
- Work order line items
- Custom objects
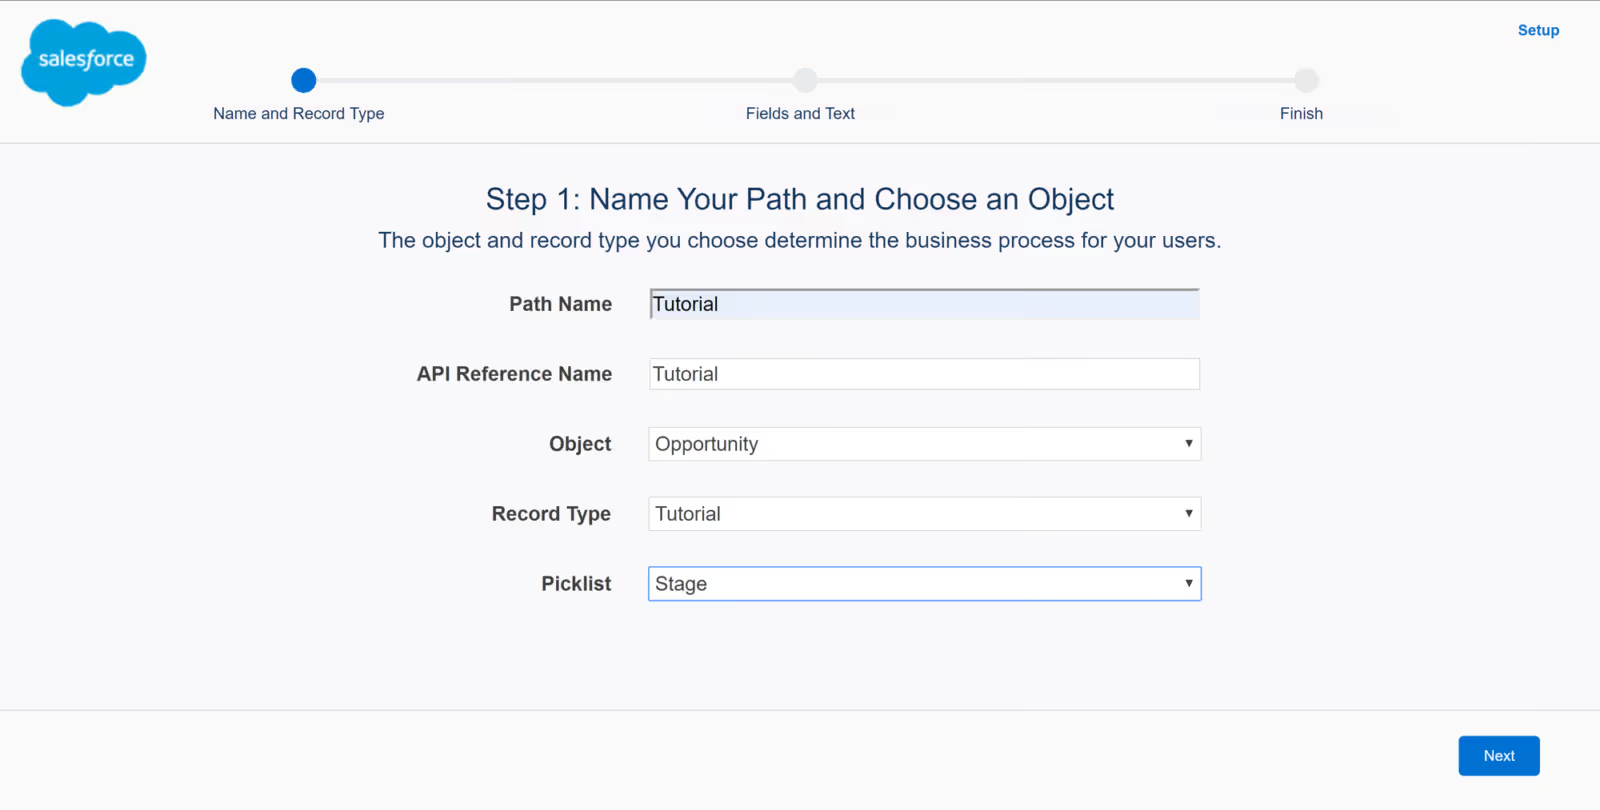
Here’s how you can set up a Salesforce path:
In Setup, go to Path settings and click Enable.
Then, click on Create and add a name for the path, select the record type, and fill out all the other relevant details.
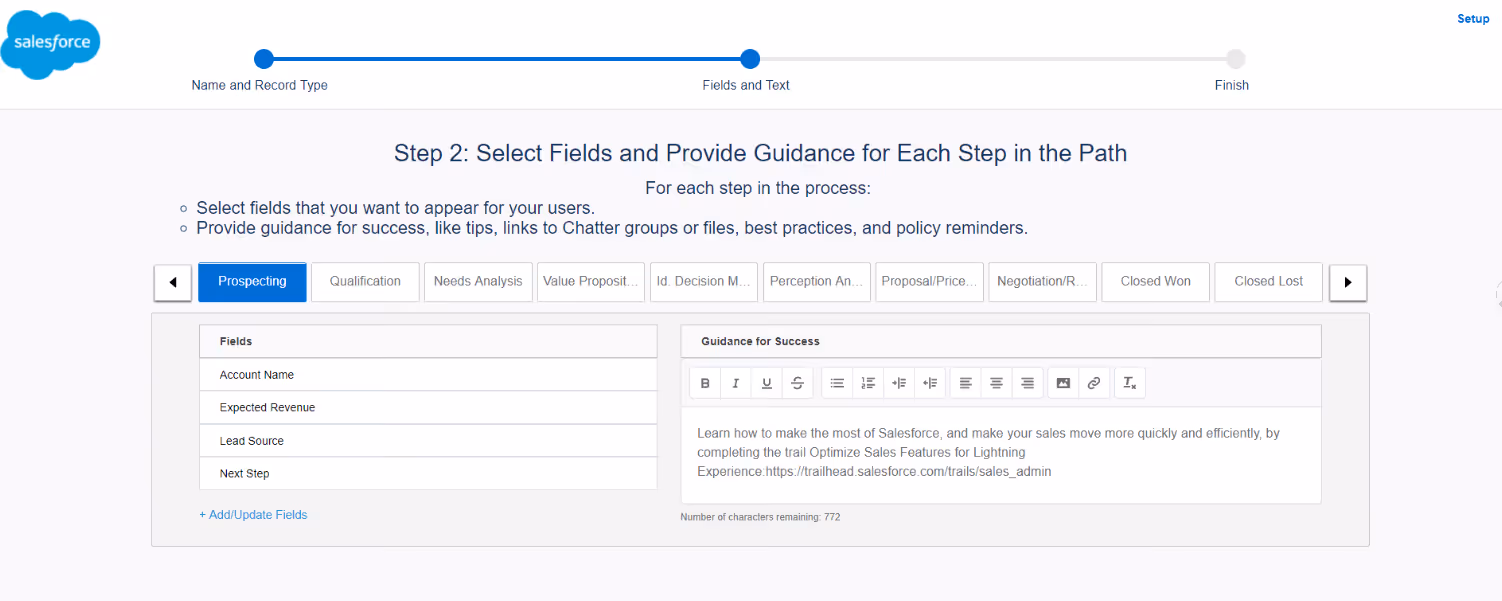
Click through each picklist to add guidance for your sales reps. Keep in mind that you can select up to five key fields for each step. The text is limited to 1,000 characters, including images and links.
Select Next to proceed.
In the final step, activate the path. You can also enable the confetti celebration animation to gamify the experience and make it more fun for your reps. If enabled, sales reps will see virtual confetti when they reach specific steps of the path.

Finally, click on Finish.
You’ll want to create field dependencies to ensure all fields are filled out before a rep moves an opportunity forward.
Additionally, make sure that you don’t include new and existing opportunities on the same path. Keeping these two on different paths will allow you to forecast potential revenue more accurately and have separate pipeline views to detect issues more effectively.
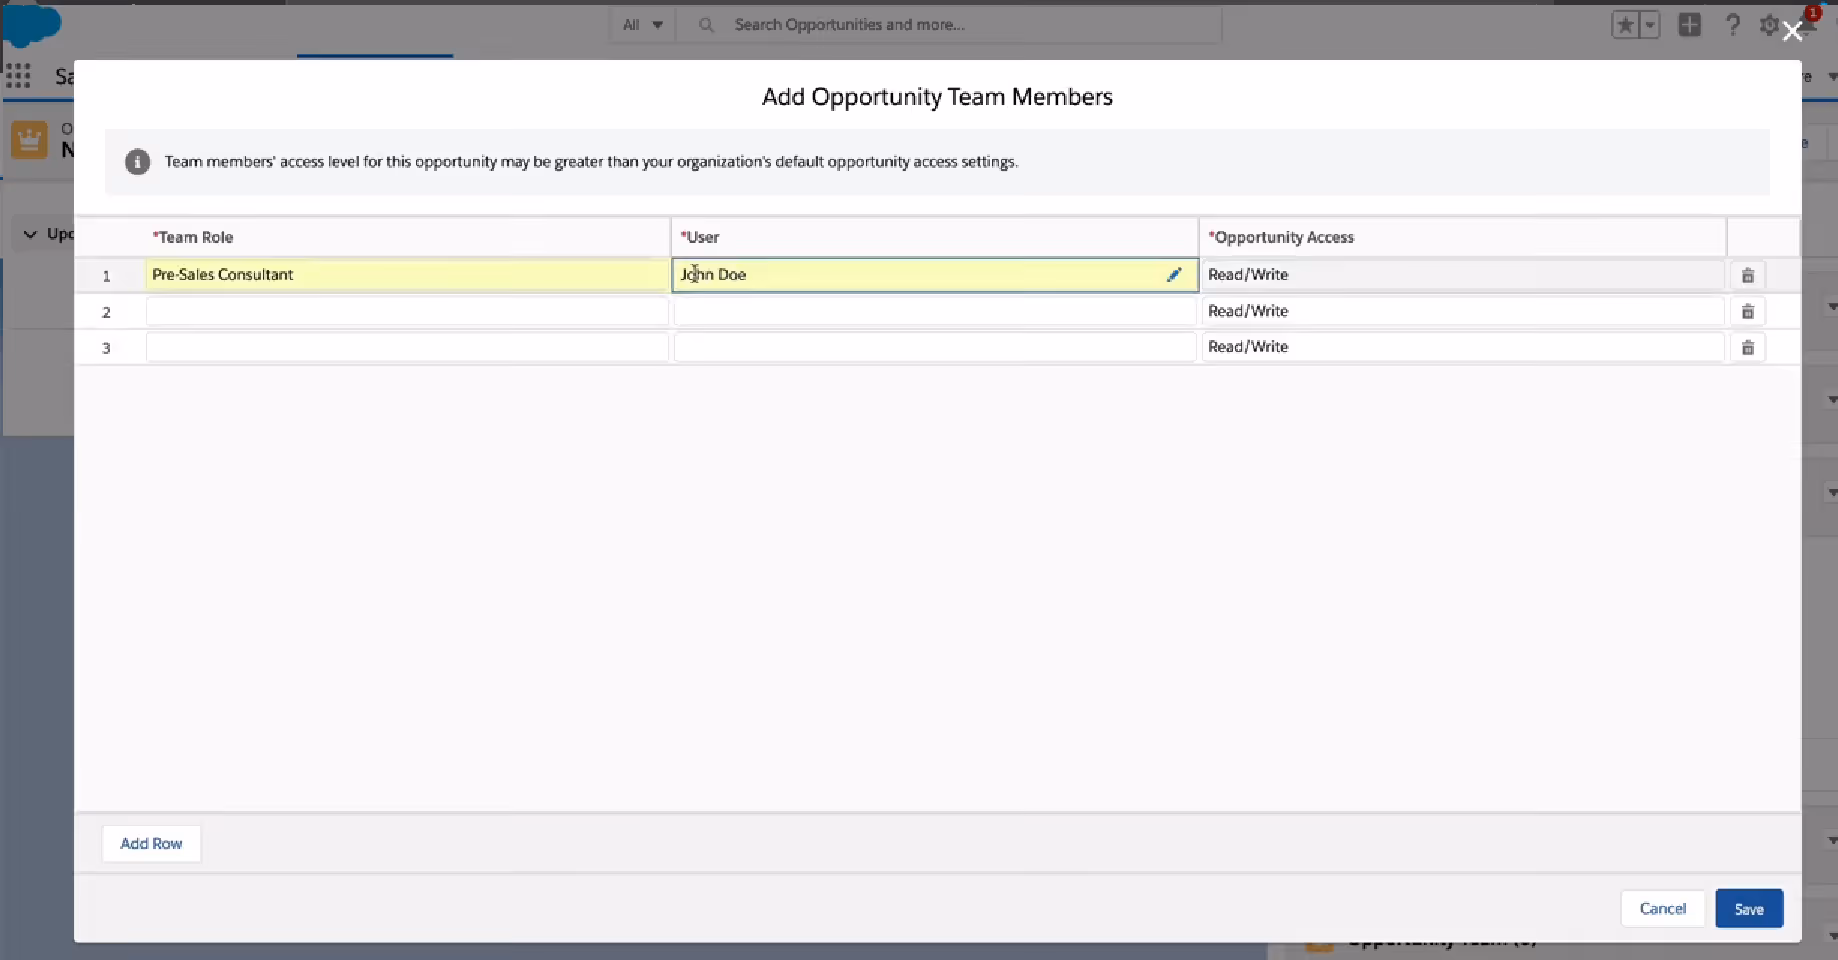
5. Set up Opportunity Teams
Salesforce opportunity teams allow you to add team members and other partner users who are working together on a deal. This helps foster collaboration between stakeholders and ensures everyone is on the same page regarding a deal.
To create an opportunity team, go to advanced user details, then find the Default opportunity team option and click Add.
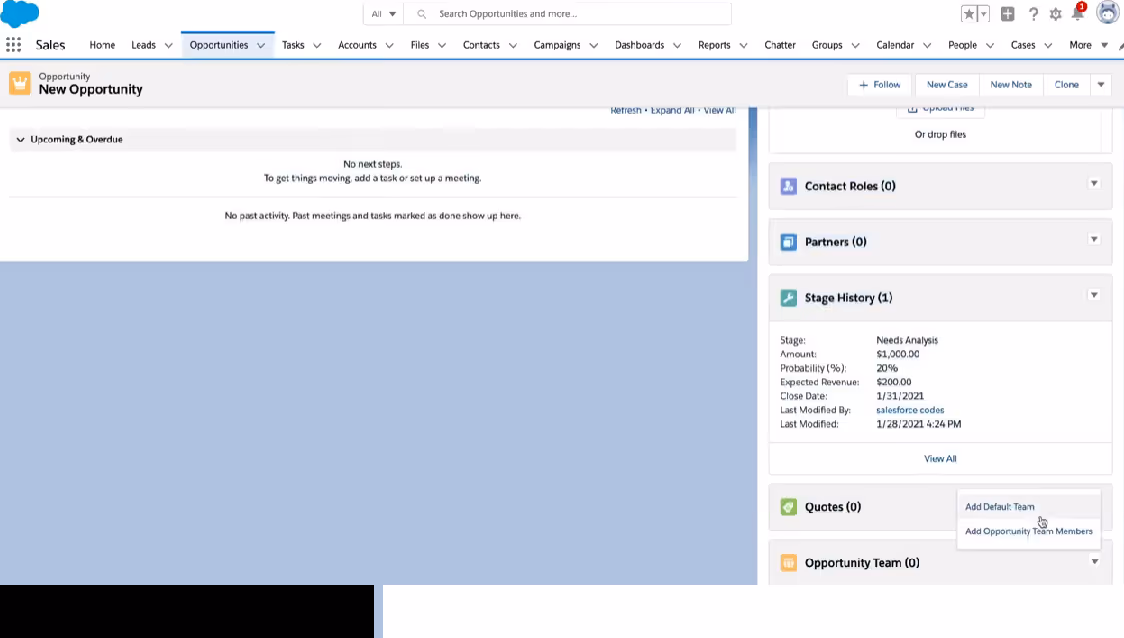
Next, add team members, define their roles, and set up specific access levels.
Then, add your team to opportunities. You can either assign your team to all open opportunities or to individual opportunities.
Once everything is done, click on Save.
6. Conduct regular pipeline reviews
Conducting regular pipeline reviews is essential for staying on top of all ongoing opportunities in Salesforce.
During these types of reviews, you’ll want reps to report on the status of each opportunity in the pipeline and ensure that there are next steps assigned for every opportunity.
While these kinds of reviews can be somewhat cumbersome to do in Salesforce, you can use Weflow’s custom pipeline views to streamline the process.
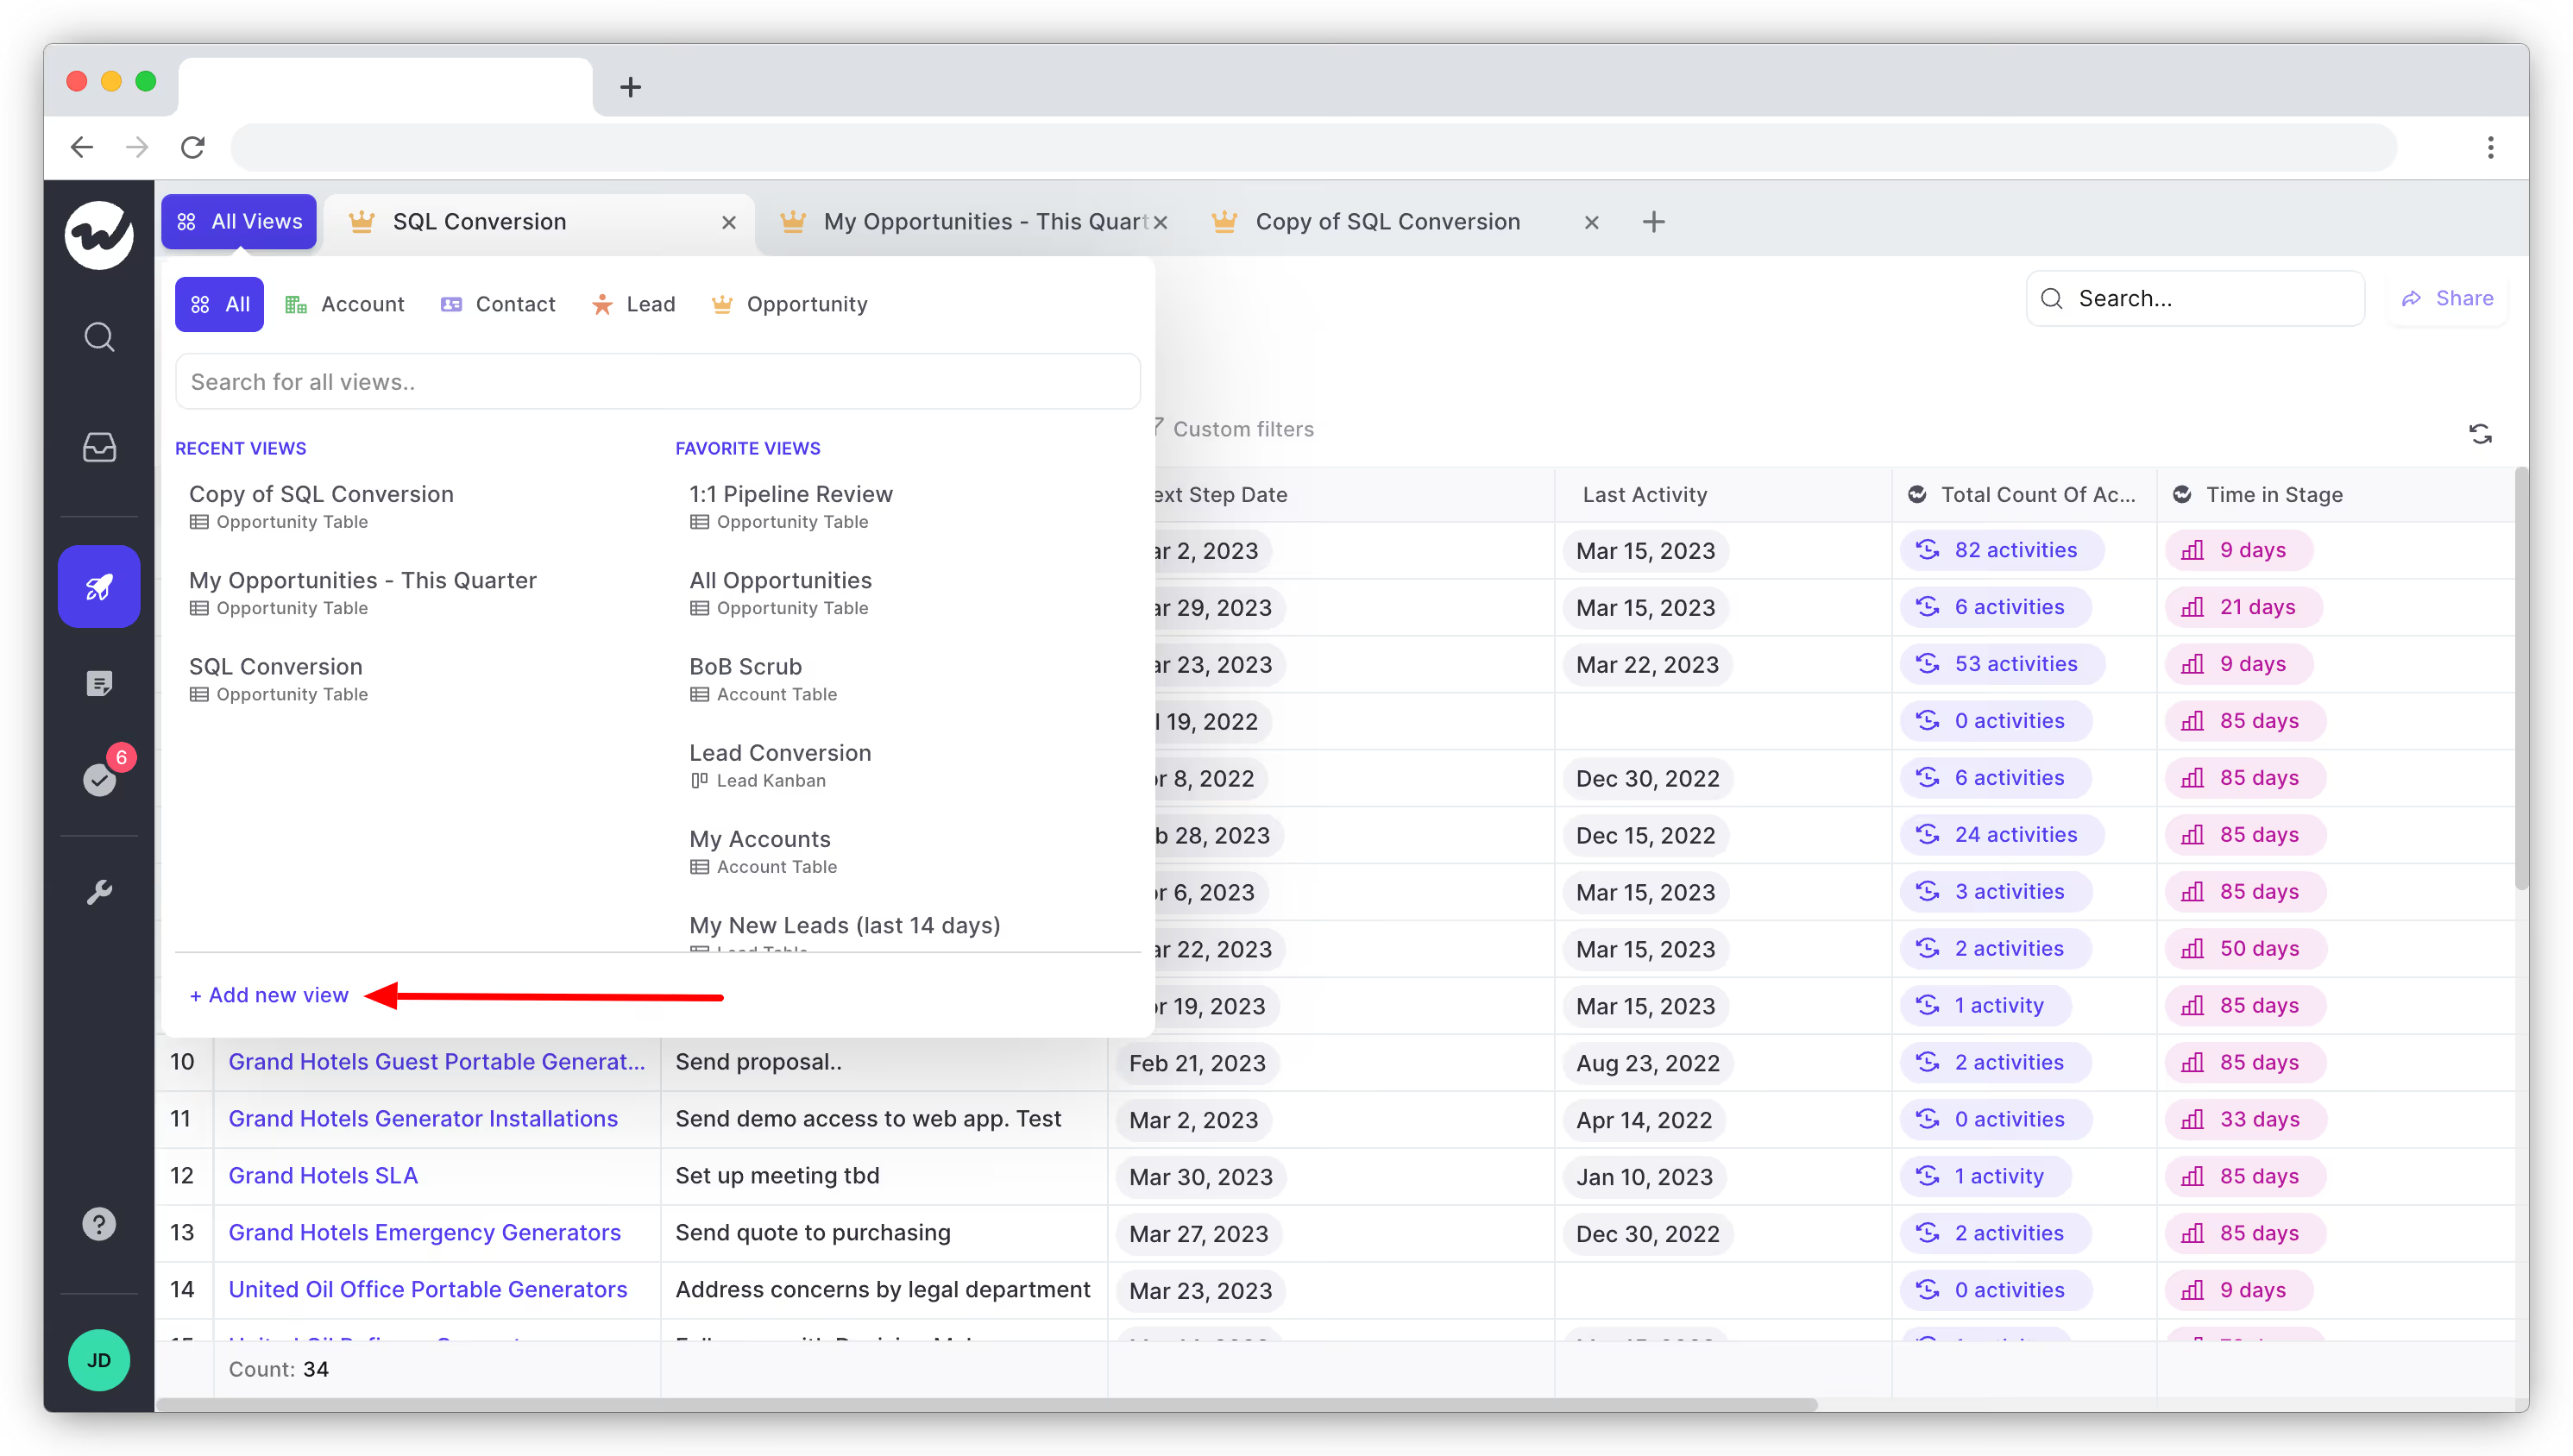
It only takes a few clicks to create a custom pipeline view in Weflow:
After logging in, click the Pipeline menu item, and then on All views.
From here, click the +Add view link.
Choose between a table and Kanban layout for your view, add a name, and select from the available record types.
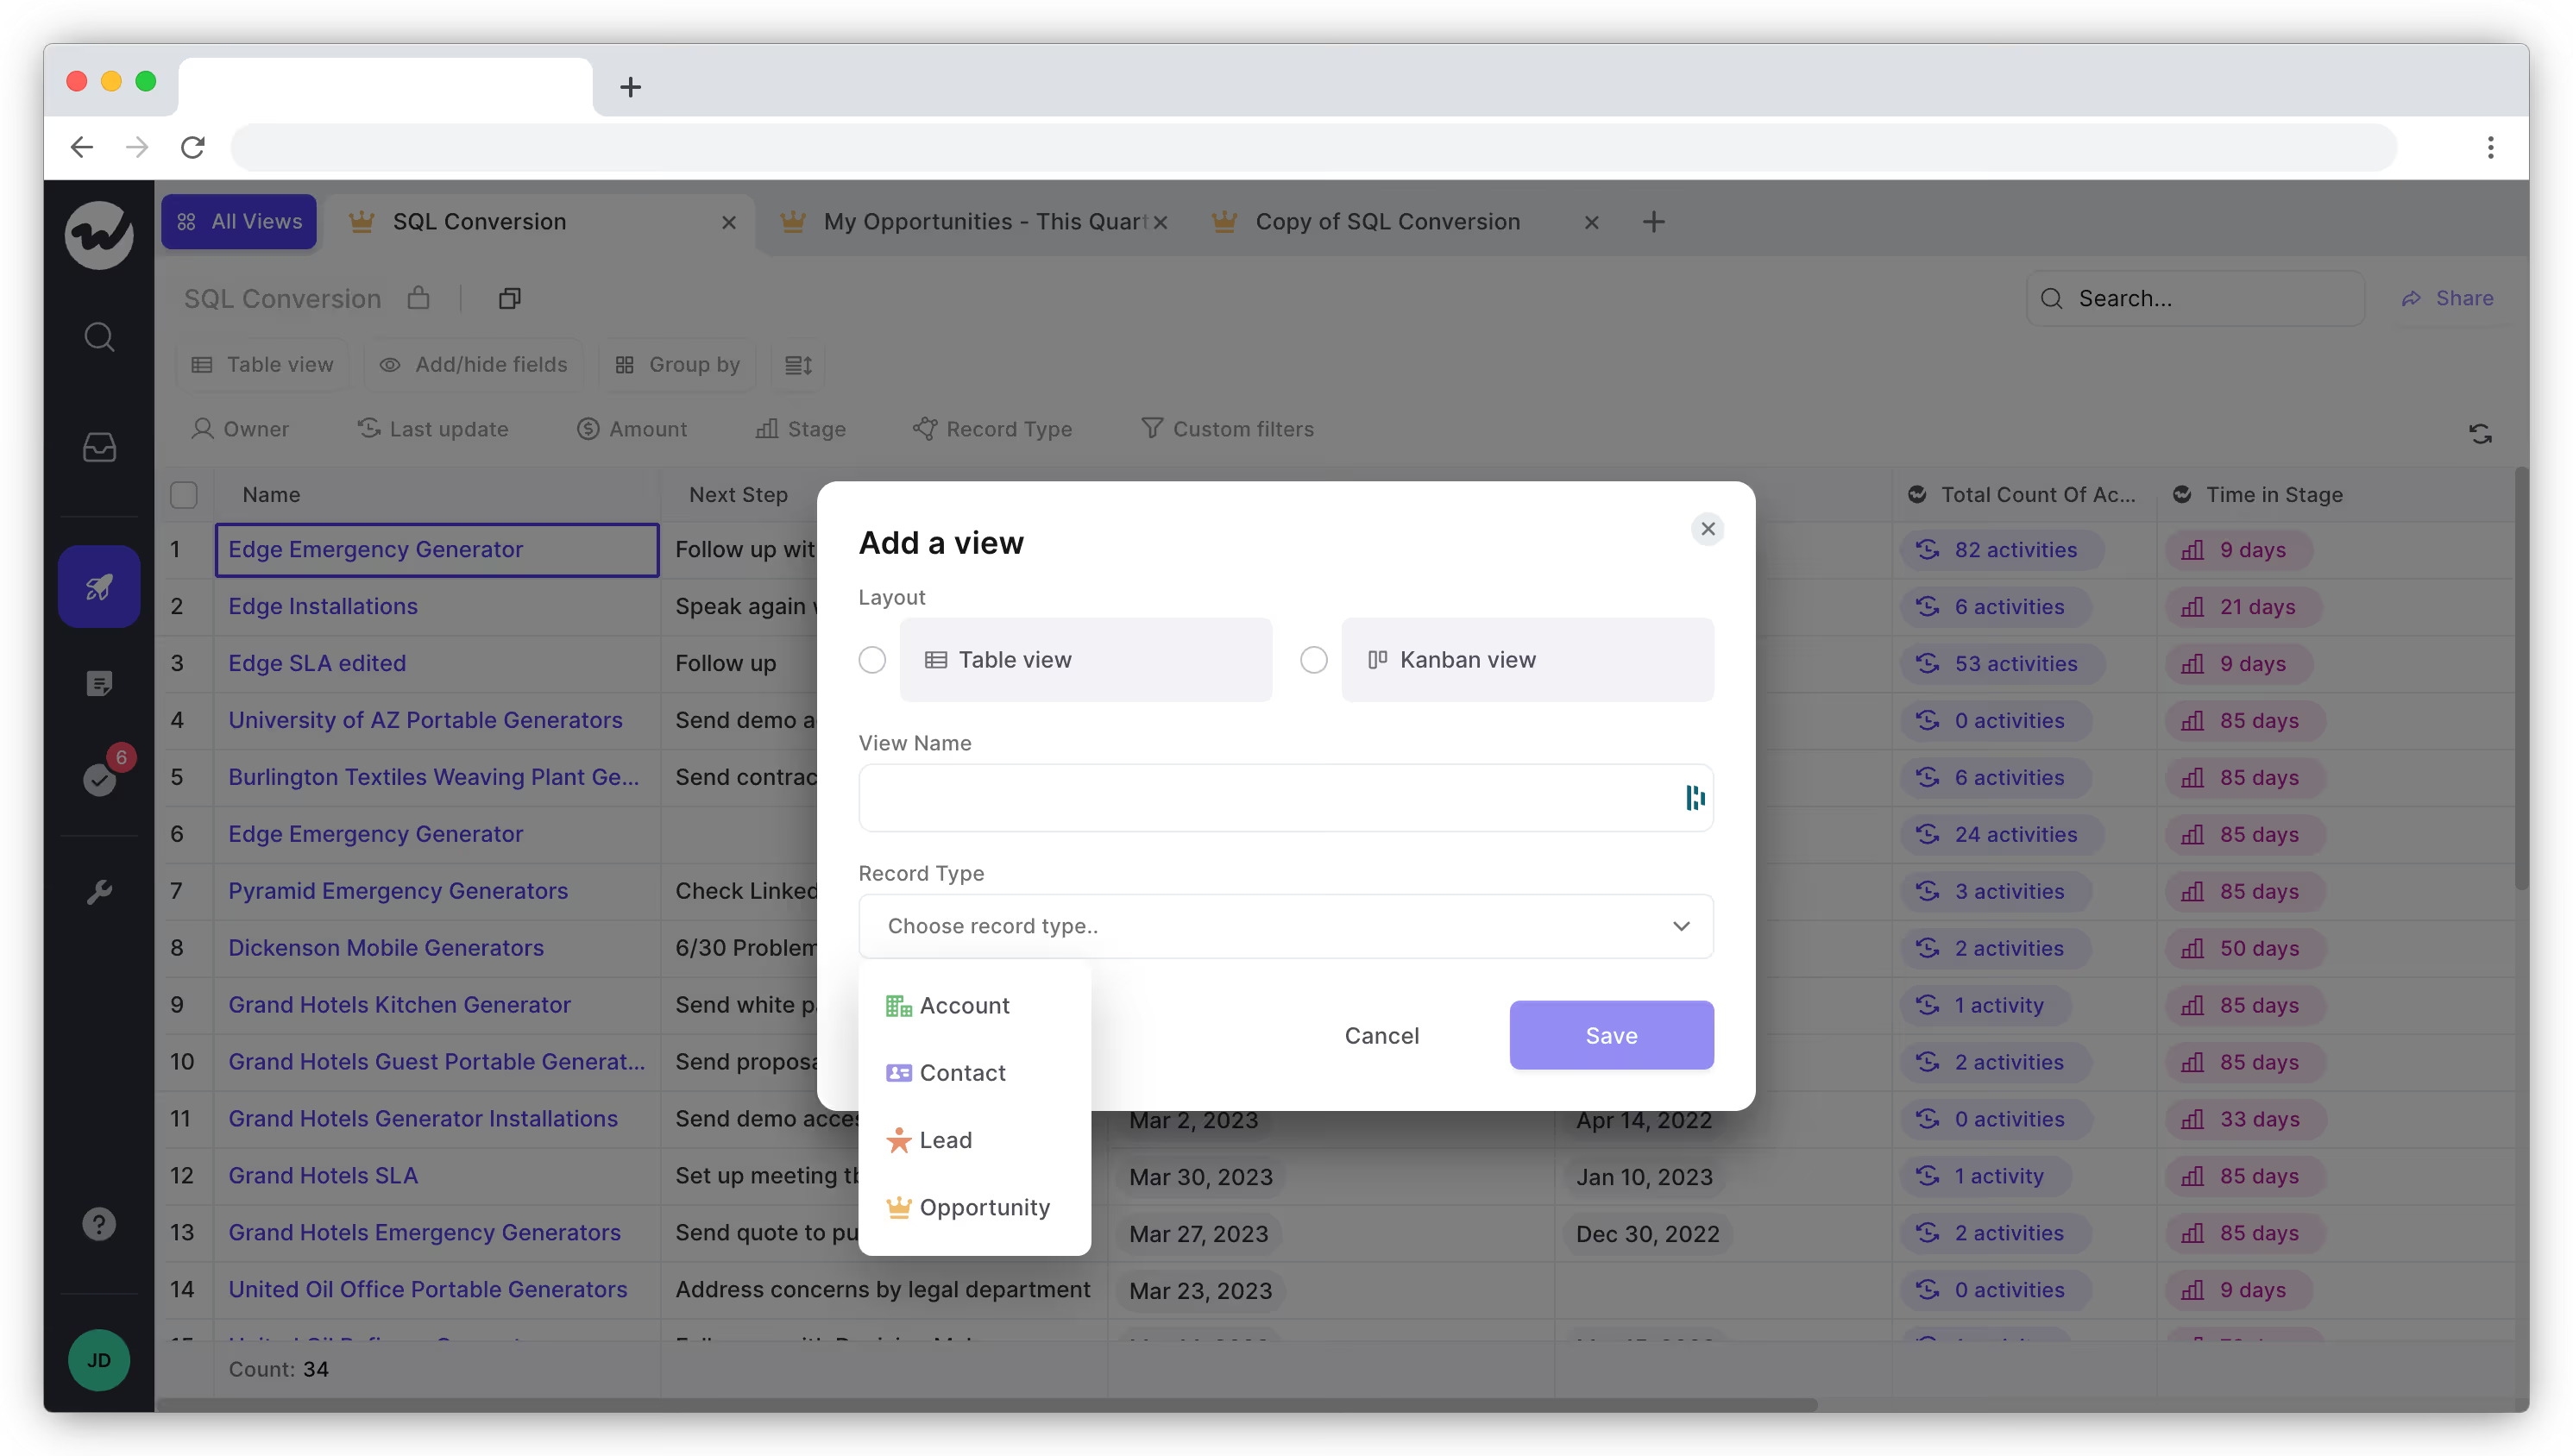
Click Save.
Weflow will now generate a pipeline view using data from your Salesforce CRM instance.
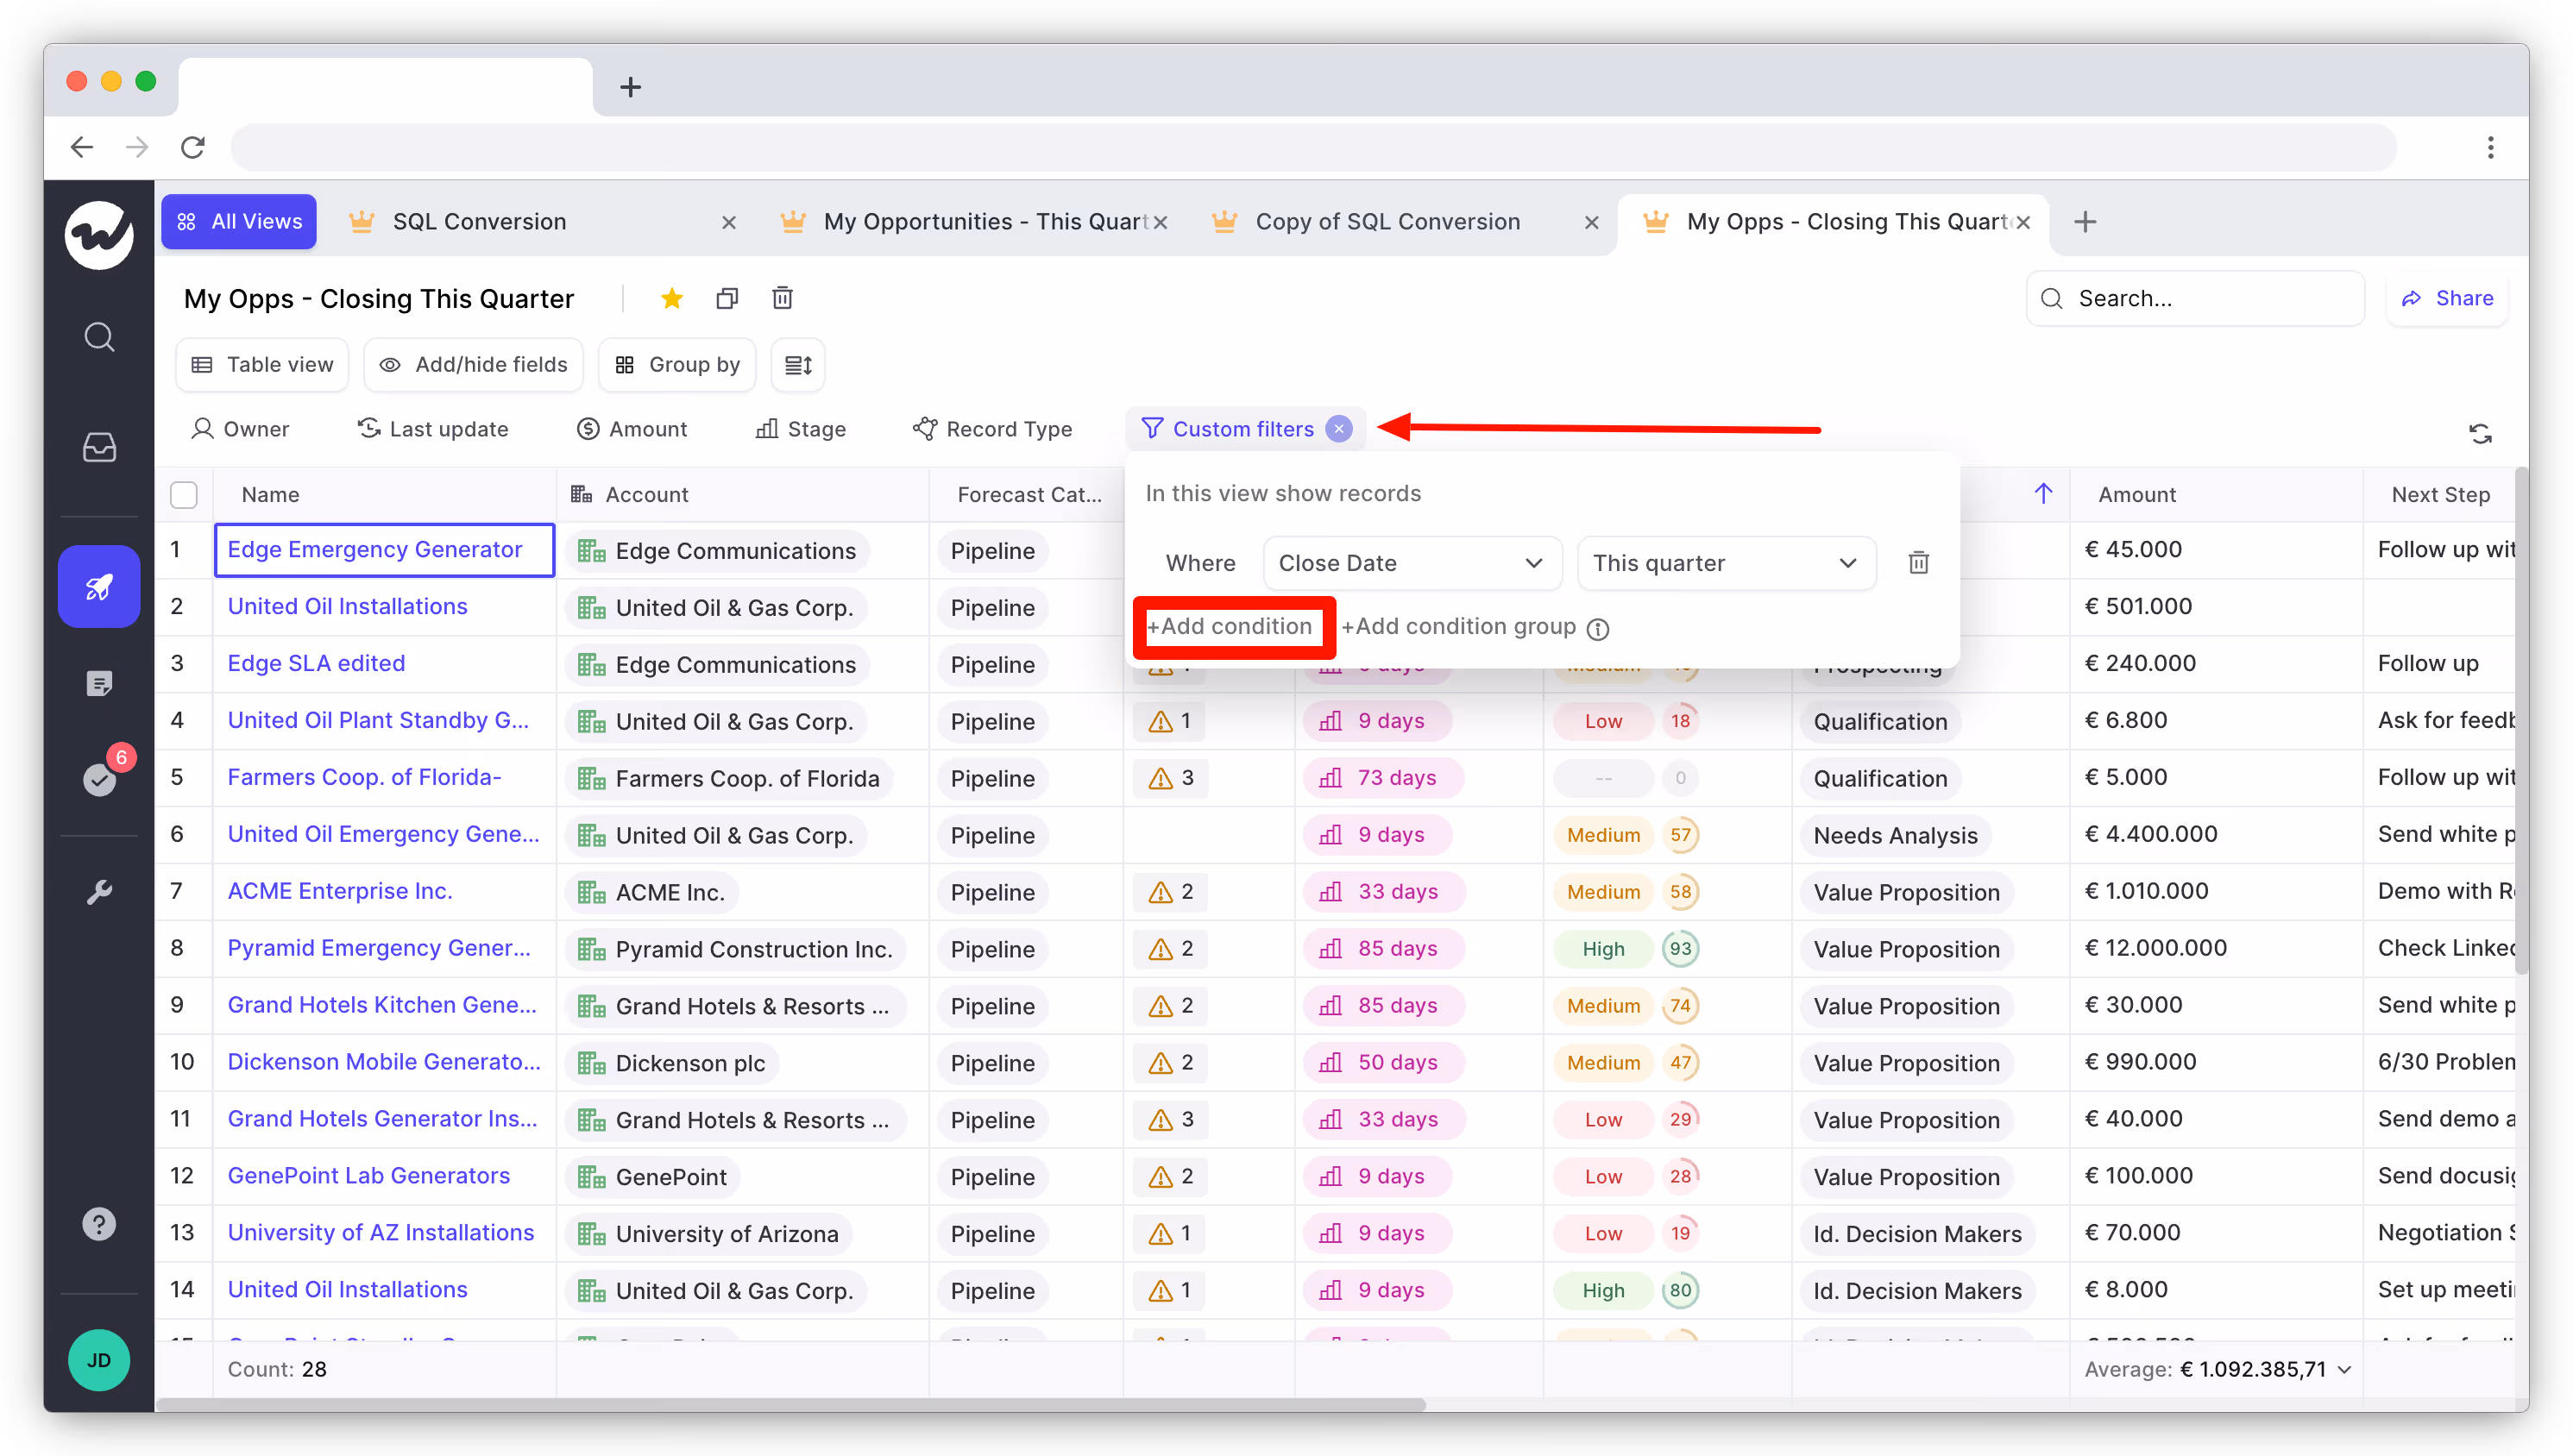
You can customize this view further by using custom filters. There’s also the option to add or hide fields, as well as update multiple opportunities at the same time using the bulk update option.
Wrap up
The tips outlined above can help improve your opportunity management processes in Salesforce and your team’s chances of closing deals.
However, keep in mind that you don’t need to implement all of the tips at once. Pick one strategy from our list and work on implementing it this week. Then, move on to the next.
Finally, make sure to bookmark this guide so that you can reference it later.
.webp)
.avif)
.webp)