3 Ways to Mass Update Records in Salesforce
Are you overwhelmed by the thought of mass updating records in Salesforce CRM? Does the idea of manually editing each entry seem like a daunting and time-consuming task?
Worry no more!
In this guide, we'll show you how to mass update multiple fields in Salesforce with ease, allowing you to improve data hygiene and focus on more important aspects of your business.
Keep on reading to learn about the three main ways to update records in Salesforce.
1. Set up a custom list view to update records in bulk
One way to update Salesforce data in bulk includes setting up a custom list view.
Before you can do this, however, there are certain user permission requirements that you need to enable.
From the Enhanced profile user interface, enable Inline Editing and Enhanced Lists.
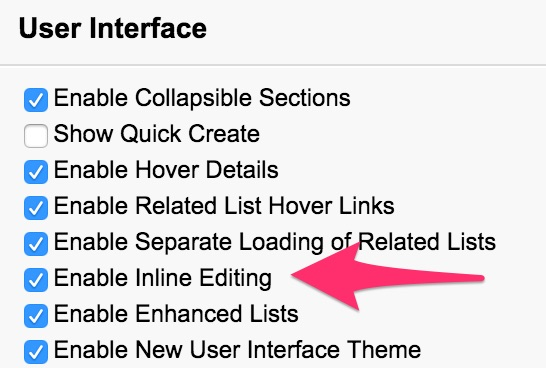
Finally, enable the Mass edit from lists option.
You can now move on to creating your list view.
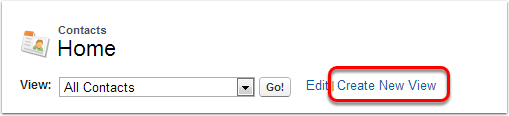
Choose the main filter for your custom view. For example, it could be Contacts, Accounts, Campaigns, etc. In this example, we will choose Contacts.

Select an already-existing view or click to create a new one.
Name your view and then click Tab to see the Unique View Name.

After that, you’ll be asked to specify the record types. This step is essential because Salesforce only allows you to bulk update from a list view if all the selected results are of the same record type.
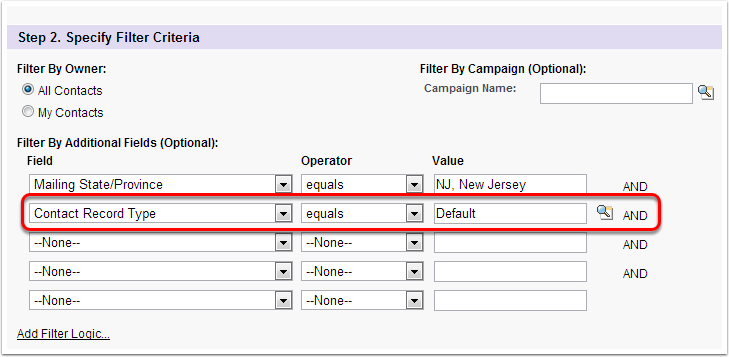
Now, you’ll need to choose the fields you’d like to see, including the ones you will mass edit. When you’re done, select the visibility and save the view.

You should be able to see an Edit button which you can click to start mass editing the existing records.
Click on the top box to select multiple records and double-click on the values you’d like to bulk edit.
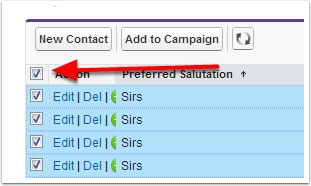
Now you can start editing through a window that will pop up on your screen. When you’re done, just make sure that you’ve applied the changes to all selected records and then click Save.
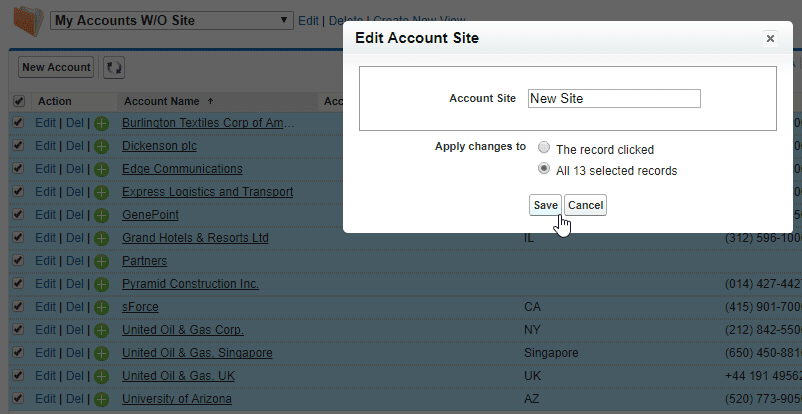
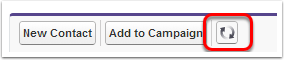
You’re done! Now you just need to click the refresh button, and you’ll be able to see all the changes.
2. Take advantage of Salesforce Data Loader
The second option for bulk updating Salesforce records is to use Salesforce Data Loader.
Data Loader is an app designed to streamline the process of importing or exporting Salesforce data in bulk. It’s mainly used when working with very large data sets.
Data Loader allows you to read, extract, and update data from .CSV files or a database connection while also exporting data when required.
It can be used in two ways: through its user-friendly interface, allowing you to configure parameters and .CSV files, as well as define field mappings, or via the command line (Windows only) for automated processing.
Let’s look at how you can update Salesforce records in bulk using the Data Loader:
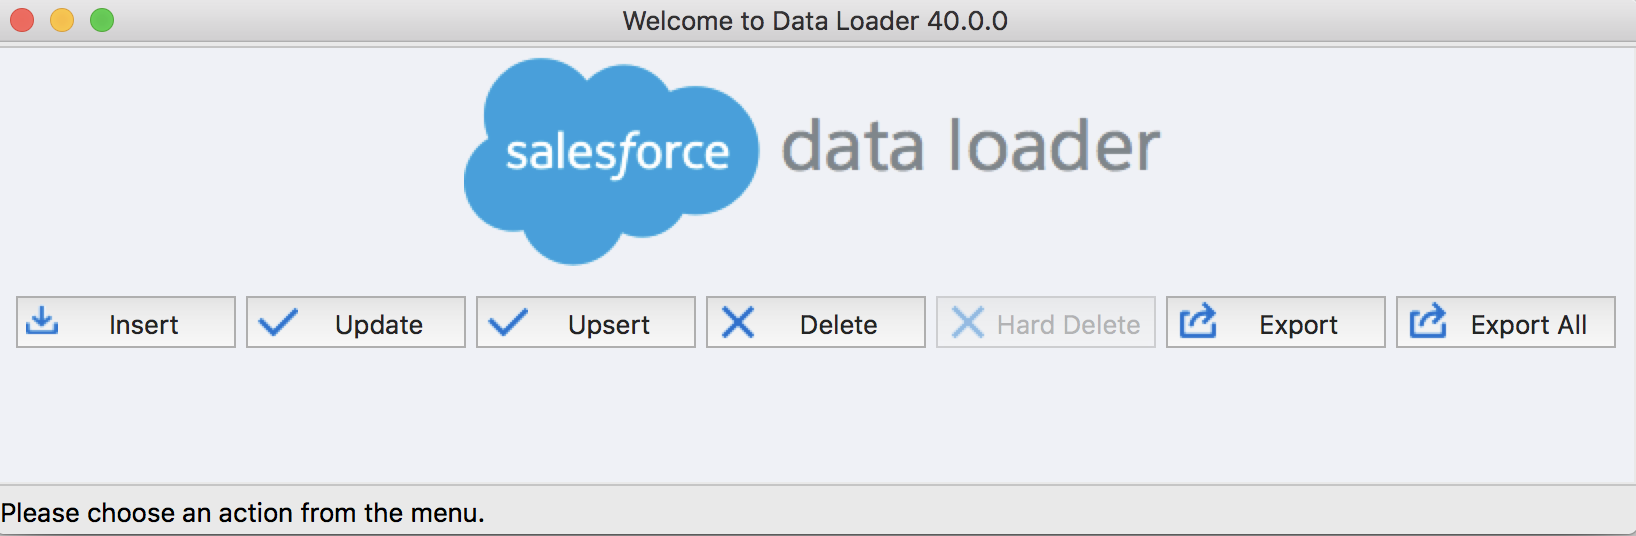
Launch Data Loader. Click on the Update button.
Log in using your Salesforce credentials.
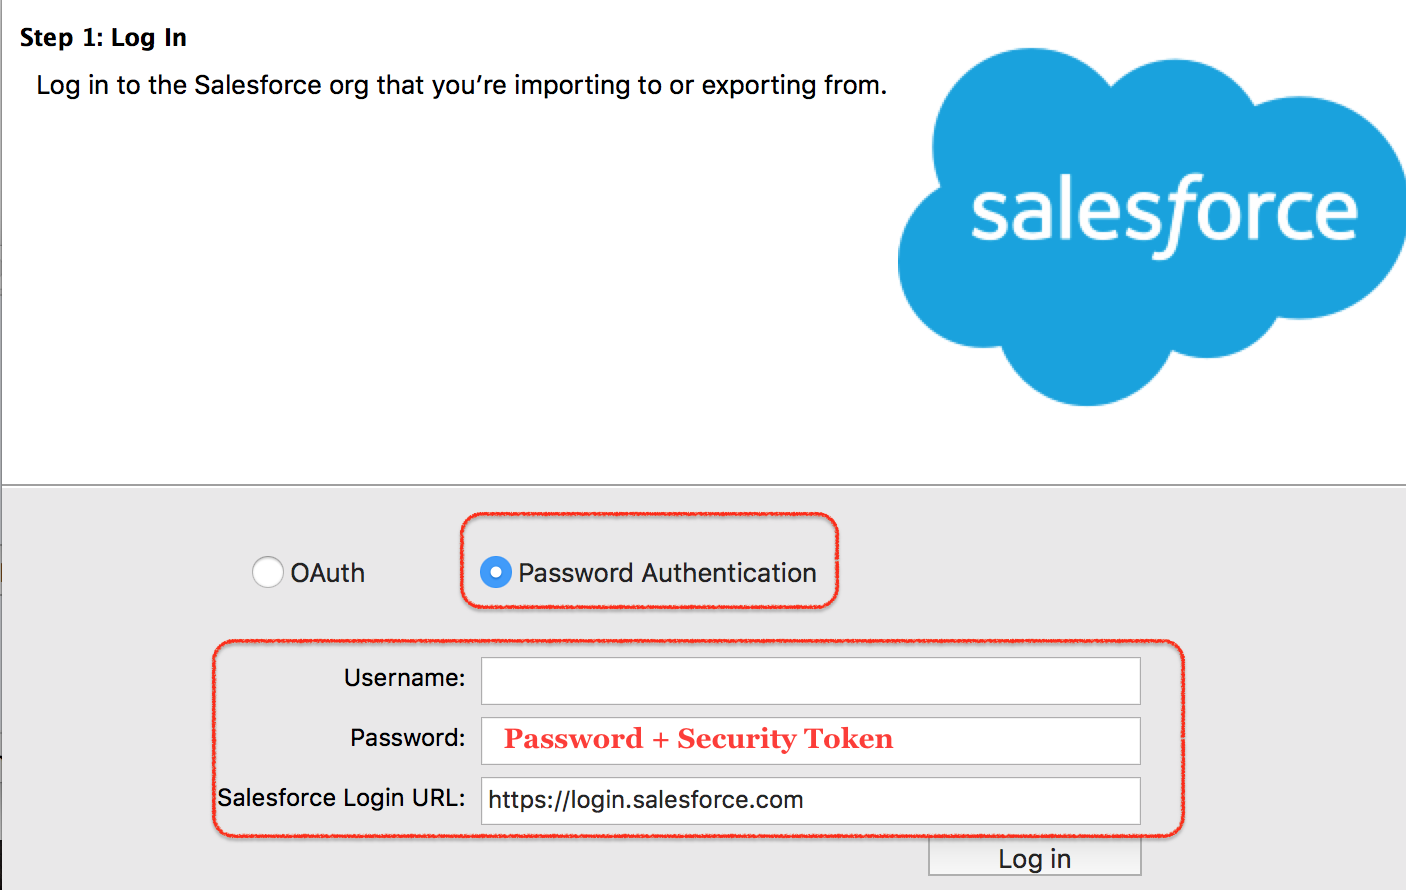
In case your organization enforces IP address restrictions, logins originating from untrusted IPs will be denied access until they’re activated. Salesforce promptly sends an activation email to enable your login.
This email includes a security token that must be appended to your password. For instance, if your password is 'mypassword' and the security token is 'XXXXXXXXXX', you’re required to input 'mypasswordXXXXXXXXXX' to log in successfully.
Once you’re in, you need to choose the object you’ll be updating. You can see some of the objects in the default list, but if you can’t find what you’re looking for, you can expand it by clicking Show all objects.
Now you need to select the .CSV file containing the updated information. Make sure that the file contains a Salesforce Record ID column. The easiest way to do this is by importing data from a Salesforce report that only includes the fields you’ll need for this update.
Choose the Details Only option when exporting, and make sure the format is set to .CSV. Update the field in your spreadsheet software and save the file.
After that, go back to the Data Loader, click Browse to select the file, and then click Next.
If you’re executing an upsert, your .CSV file needs to have a column containing ID values to match against current records. This column can be an external ID (a custom field with the External ID attribute) or a Salesforce record ID.
The upsert operation allows you to insert a new record or update an existing one in a single call. To identify if a record already exists, the upsert statement or Database method uses the record's ID as the key for matching records, a custom external ID field, or a standard field with the idLookup attribute set to ‘true’.
After that, you’ll see a dropdown list in the Data Loader Wizard that you can use to select the preferred field for matching.
In case your file contains external IDs of an object related to your selected one, you need to enable the external ID for record matching by choosing its name from the dropdown list. If you don't make a selection, you can use the related object's ID field for matching by mapping it in the next step.
Click Next to proceed.
Now you have to establish how the .CSV file columns relate to the Salesforce fields. If you already have a field mapping, click on Choose an Existing map; and if you need to create or change one, select Create or Edit a Map.
The Data Loader app will then generate two unique .CSV log files — one that starts with success and another one starting with error. Click on Browse again to choose a directory for the files, and complete the process by clicking on Finish.
The only thing left to do now is for you to review both files, and if everything is okay, close the wizard by clicking OK.
3. Use Weflow
Weflow gives you a streamlined way to update Salesforce records in bulk through its custom pipeline view and mass update features.
Start by creating a custom pipeline view that contains all the records you’d like to update. Here’s how to do it:
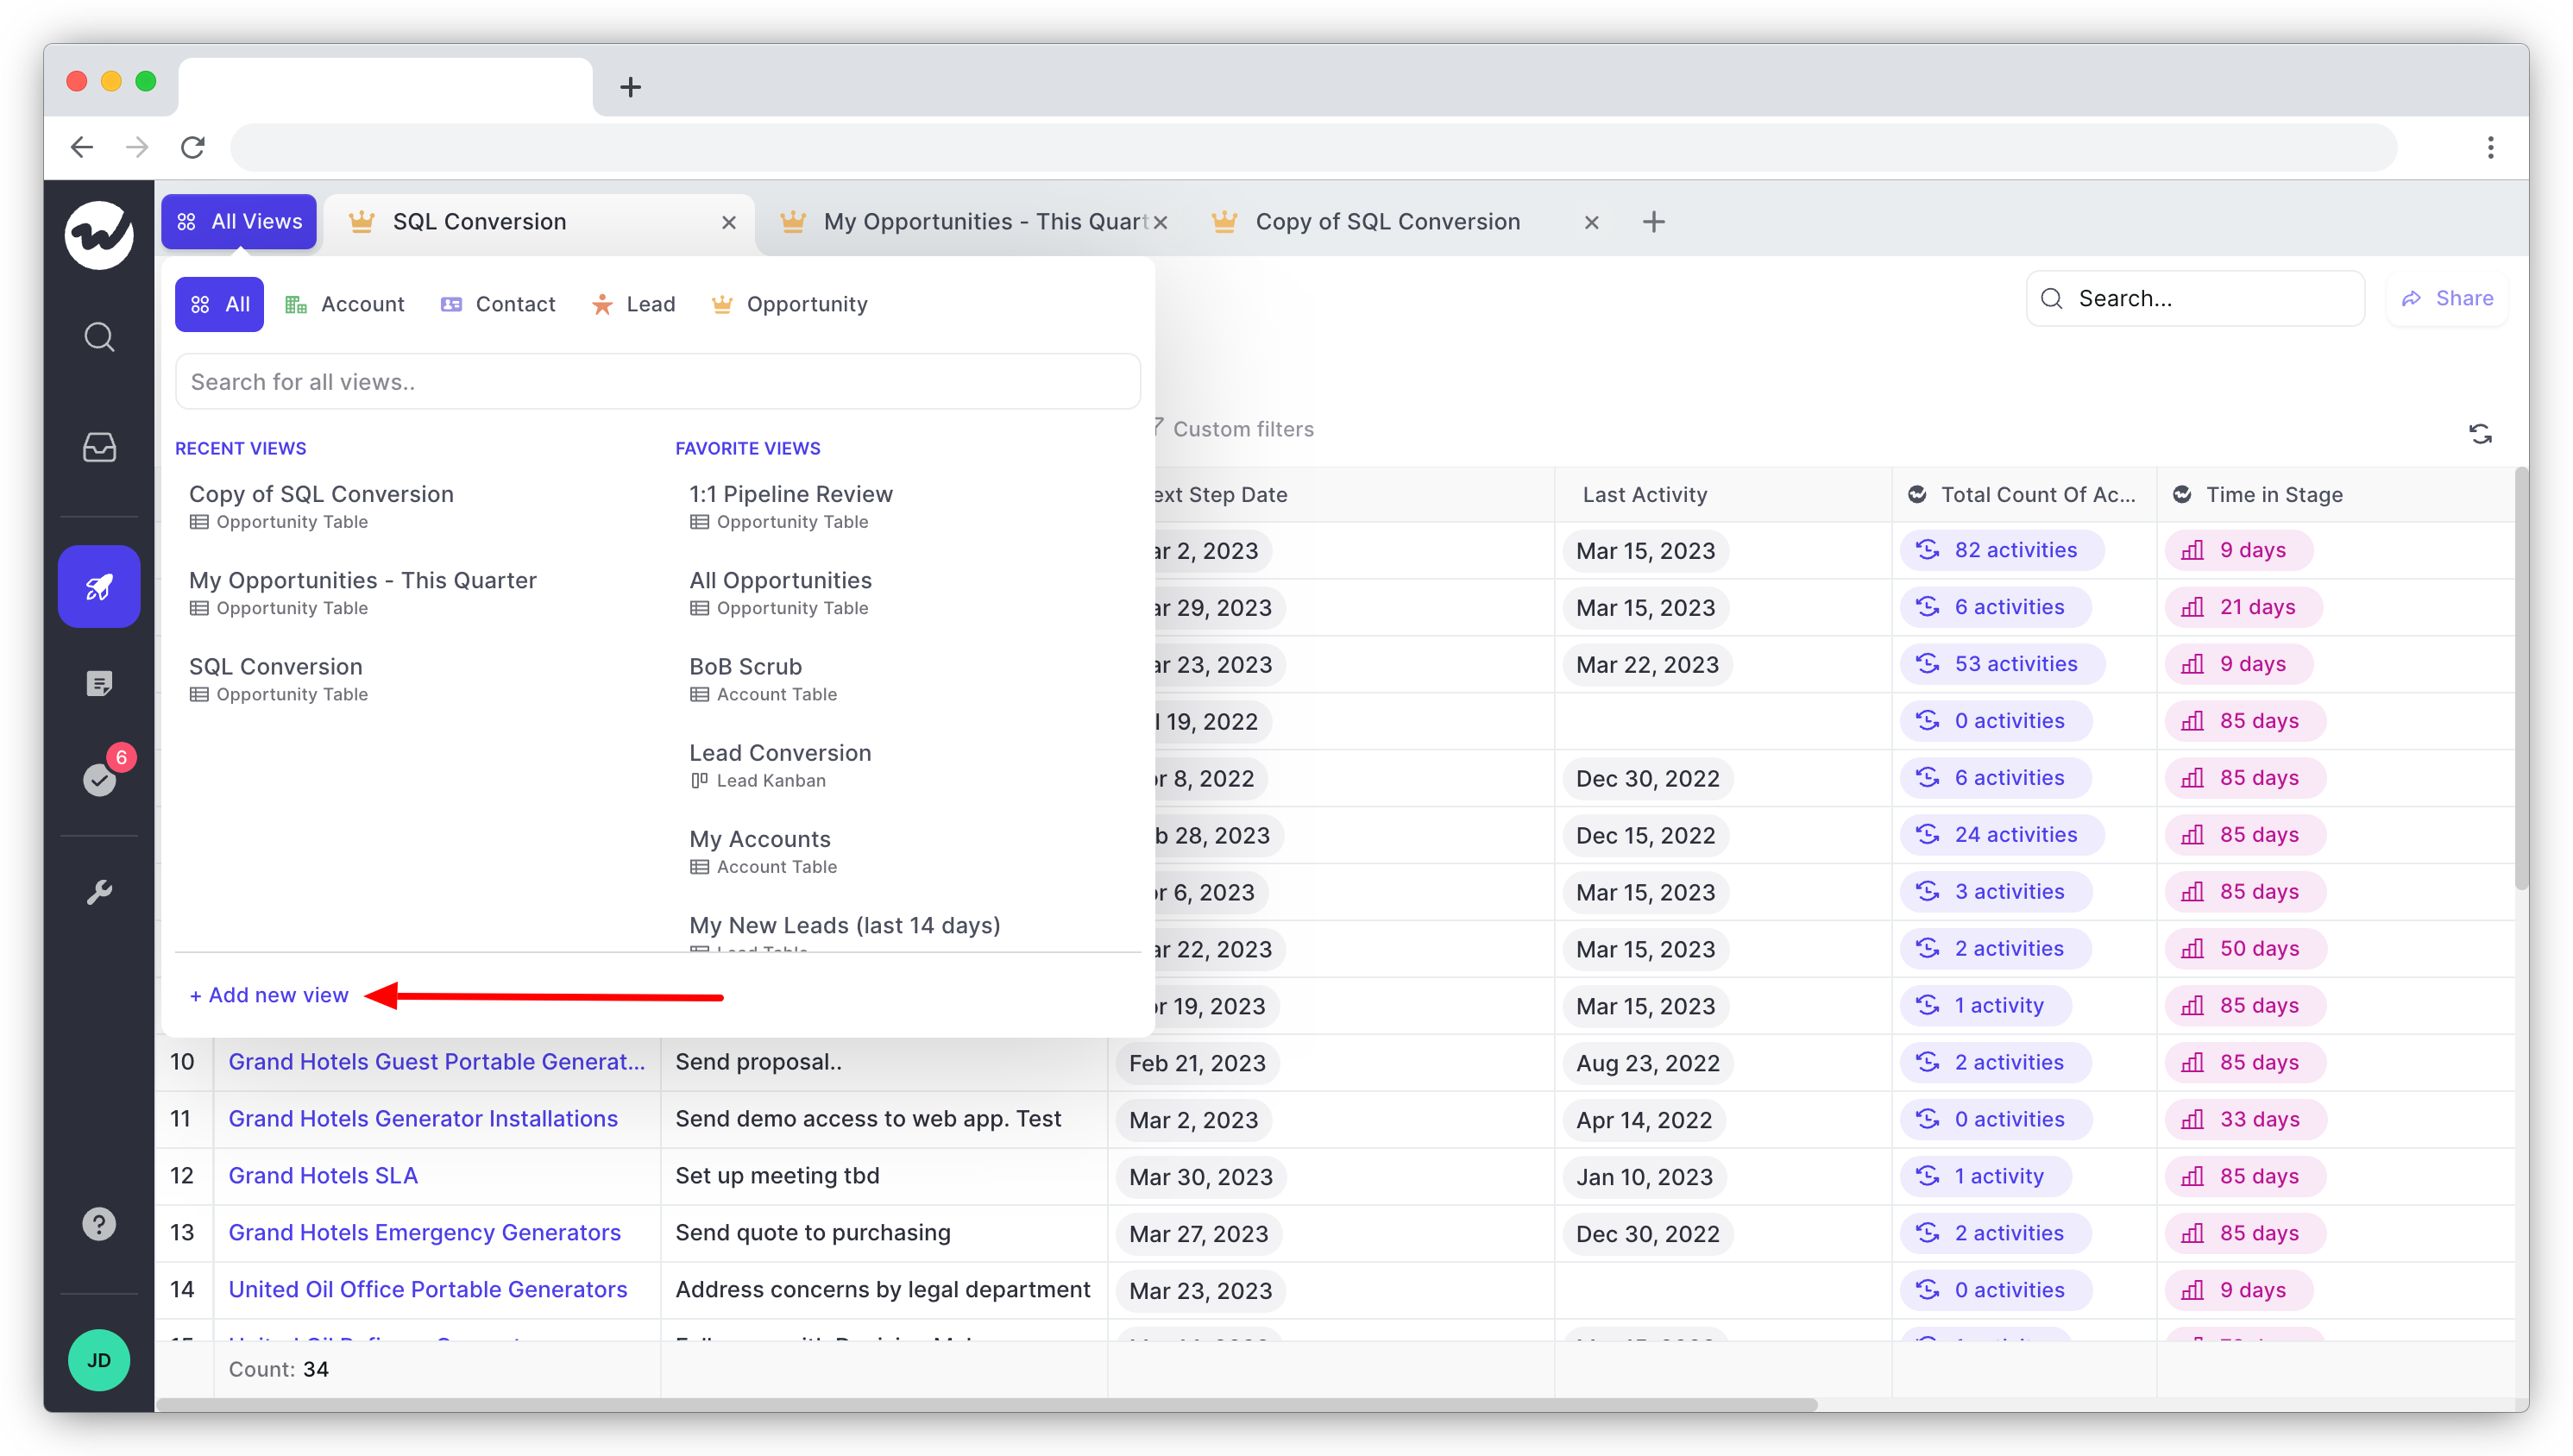
From the Weflow dashboard, click on the Pipeline menu item. Then, click on +Add new view.
Choose the layout for your pipeline view (table or Kanban), type in a name, and select a record type.
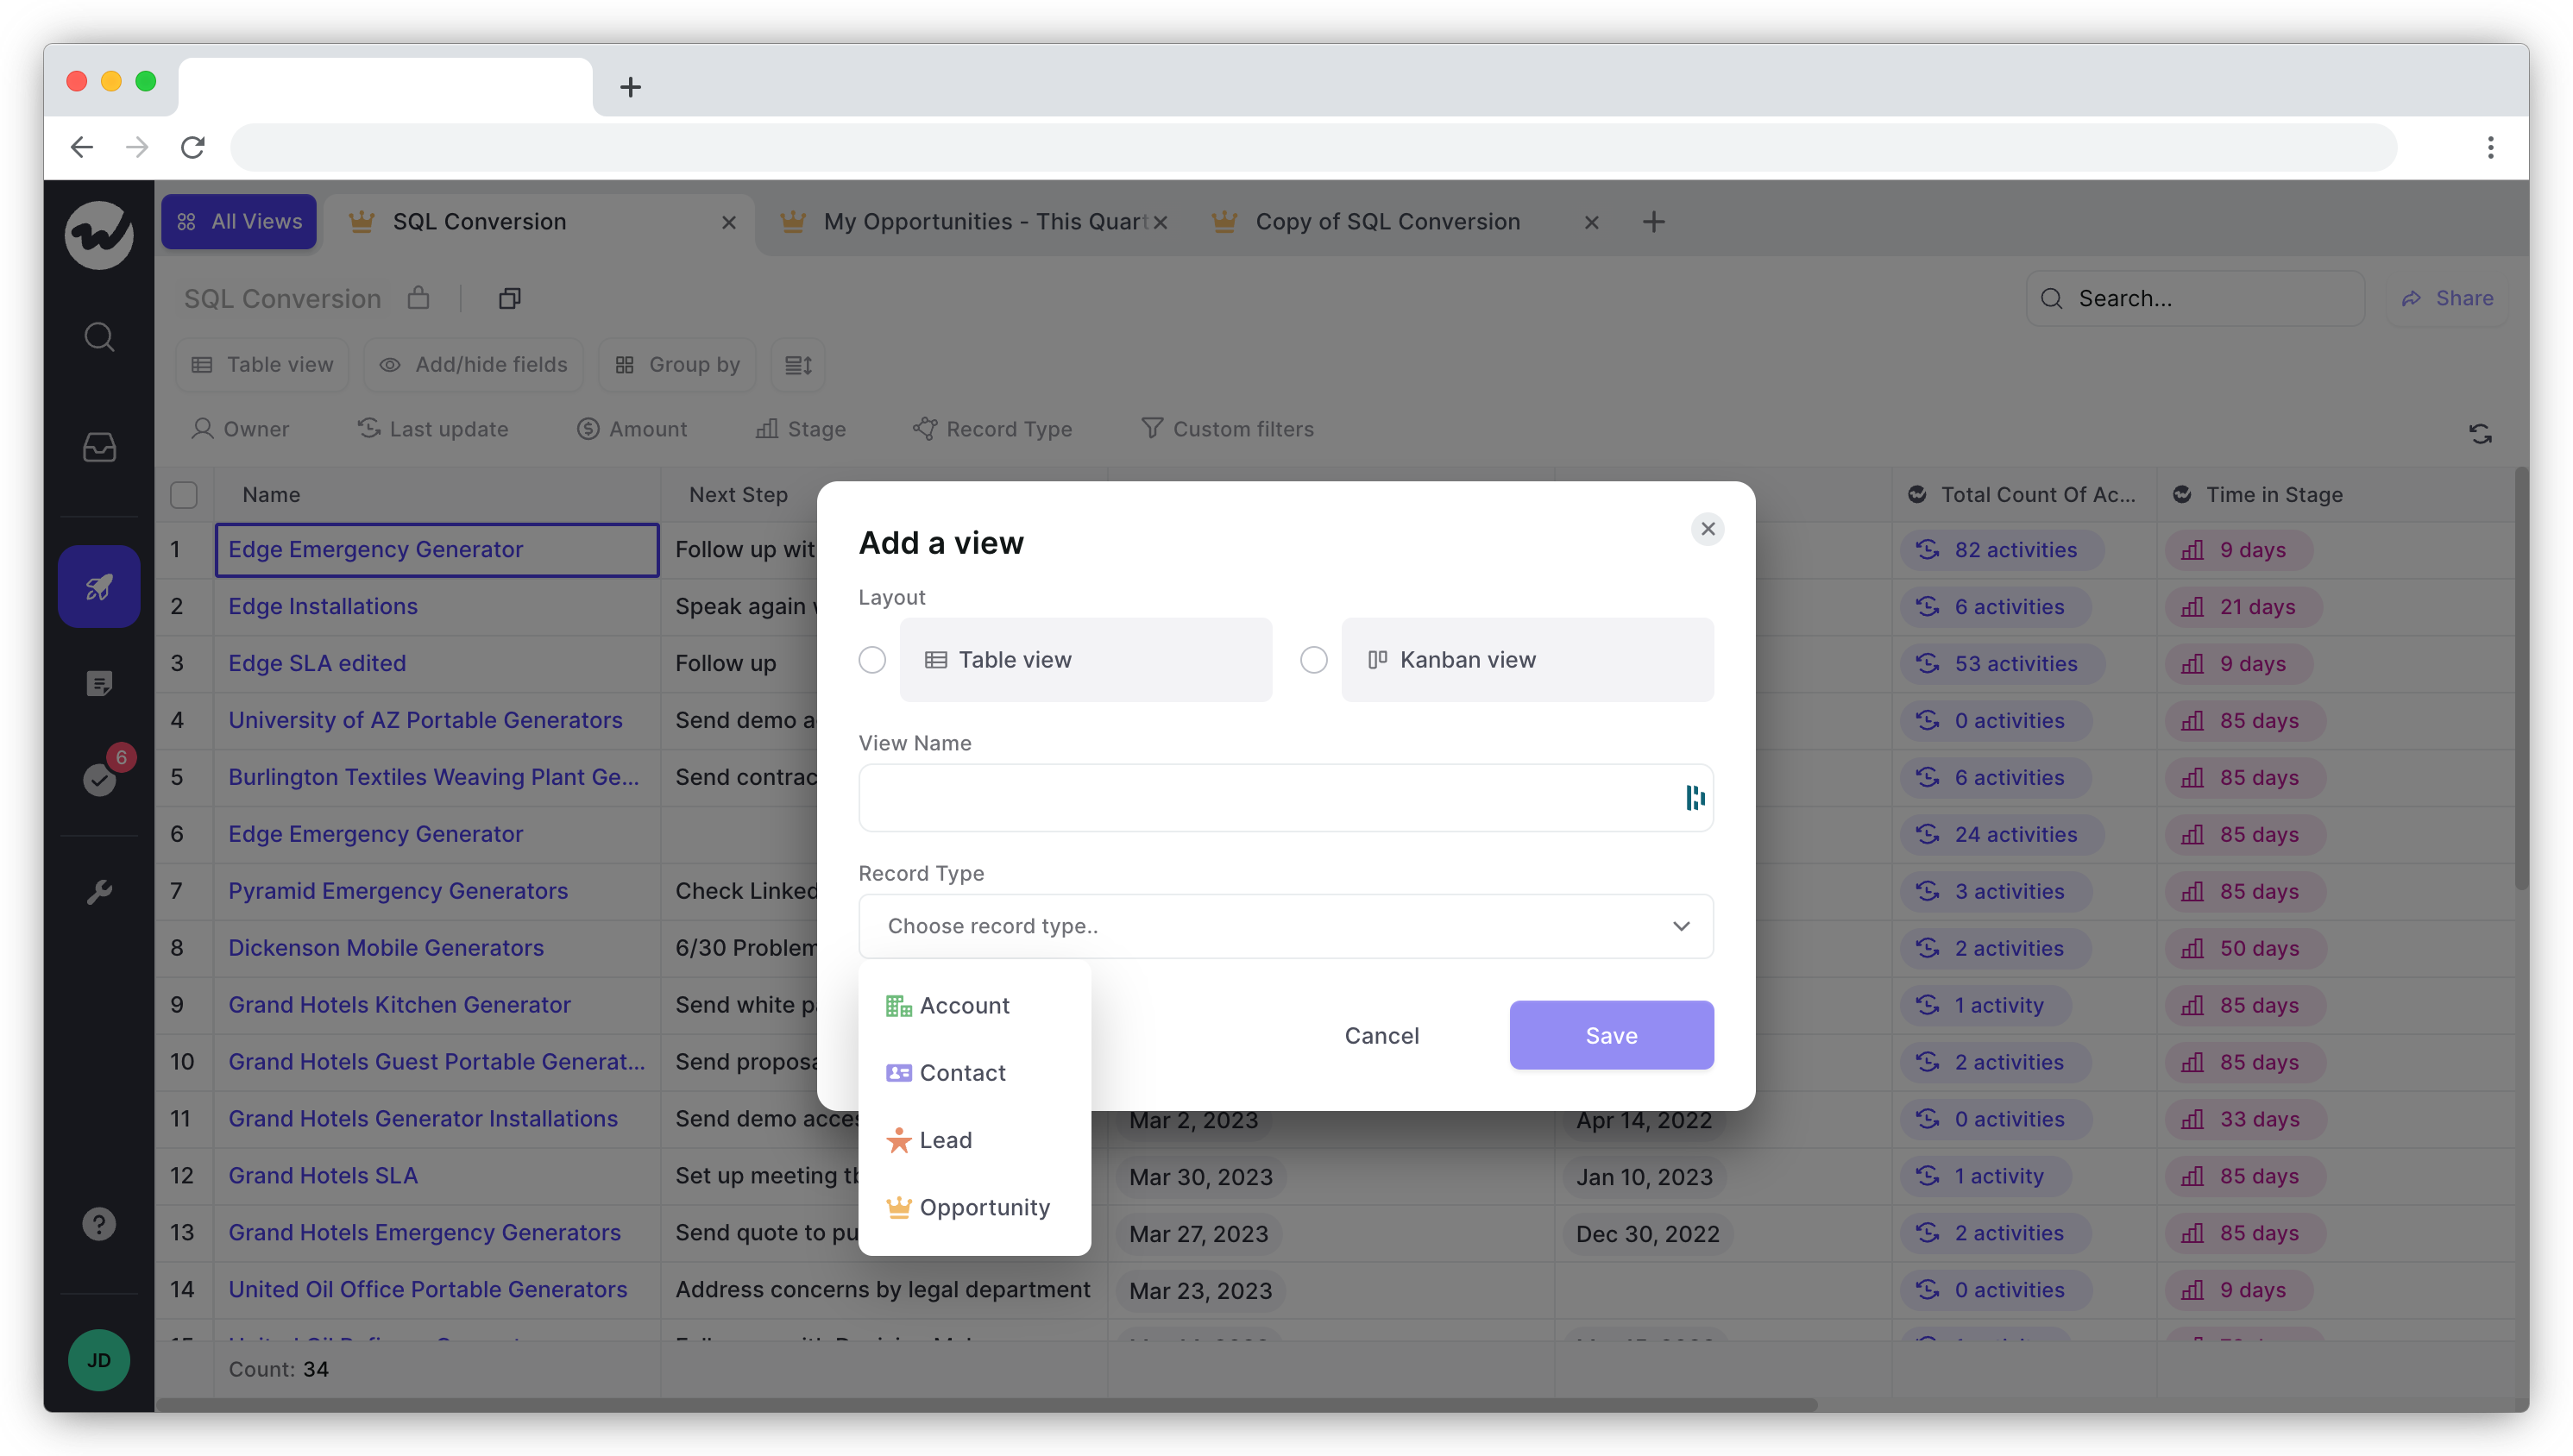
Click Save.
Weflow will now generate a view using the data from your Salesforce CRM instance.
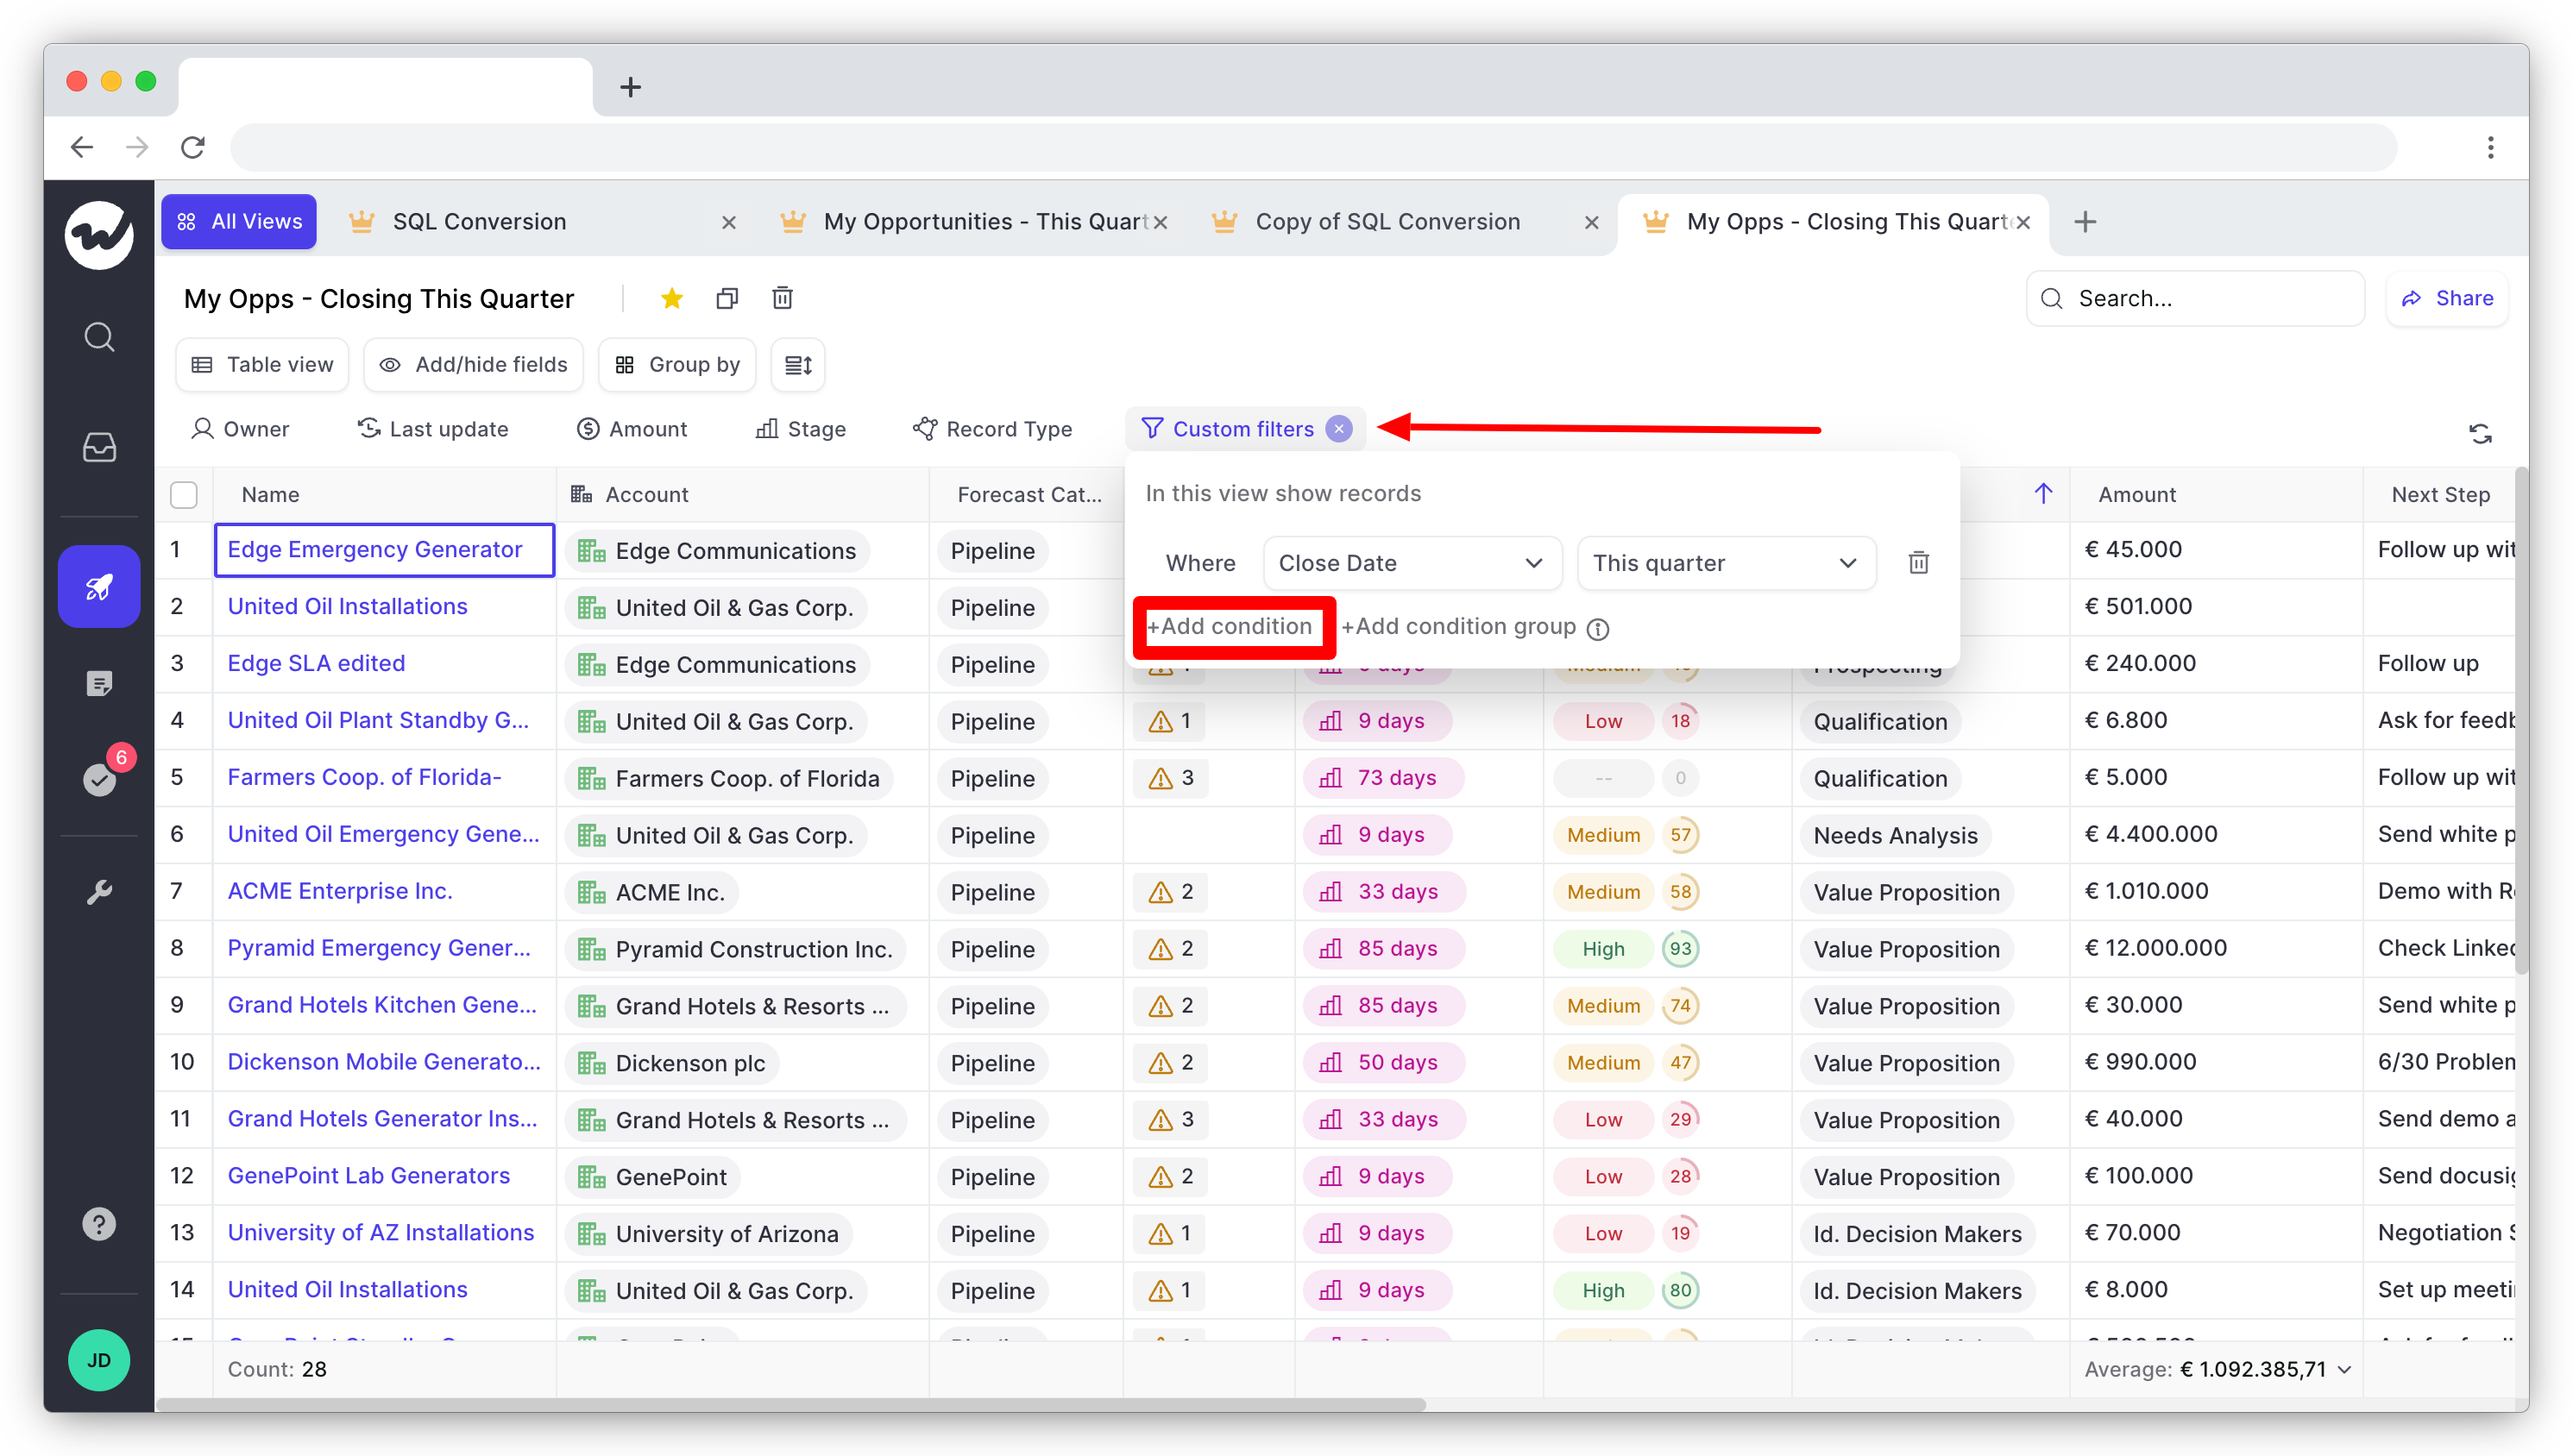
Next, use filters to make sure the view contains the data you’re looking to update.
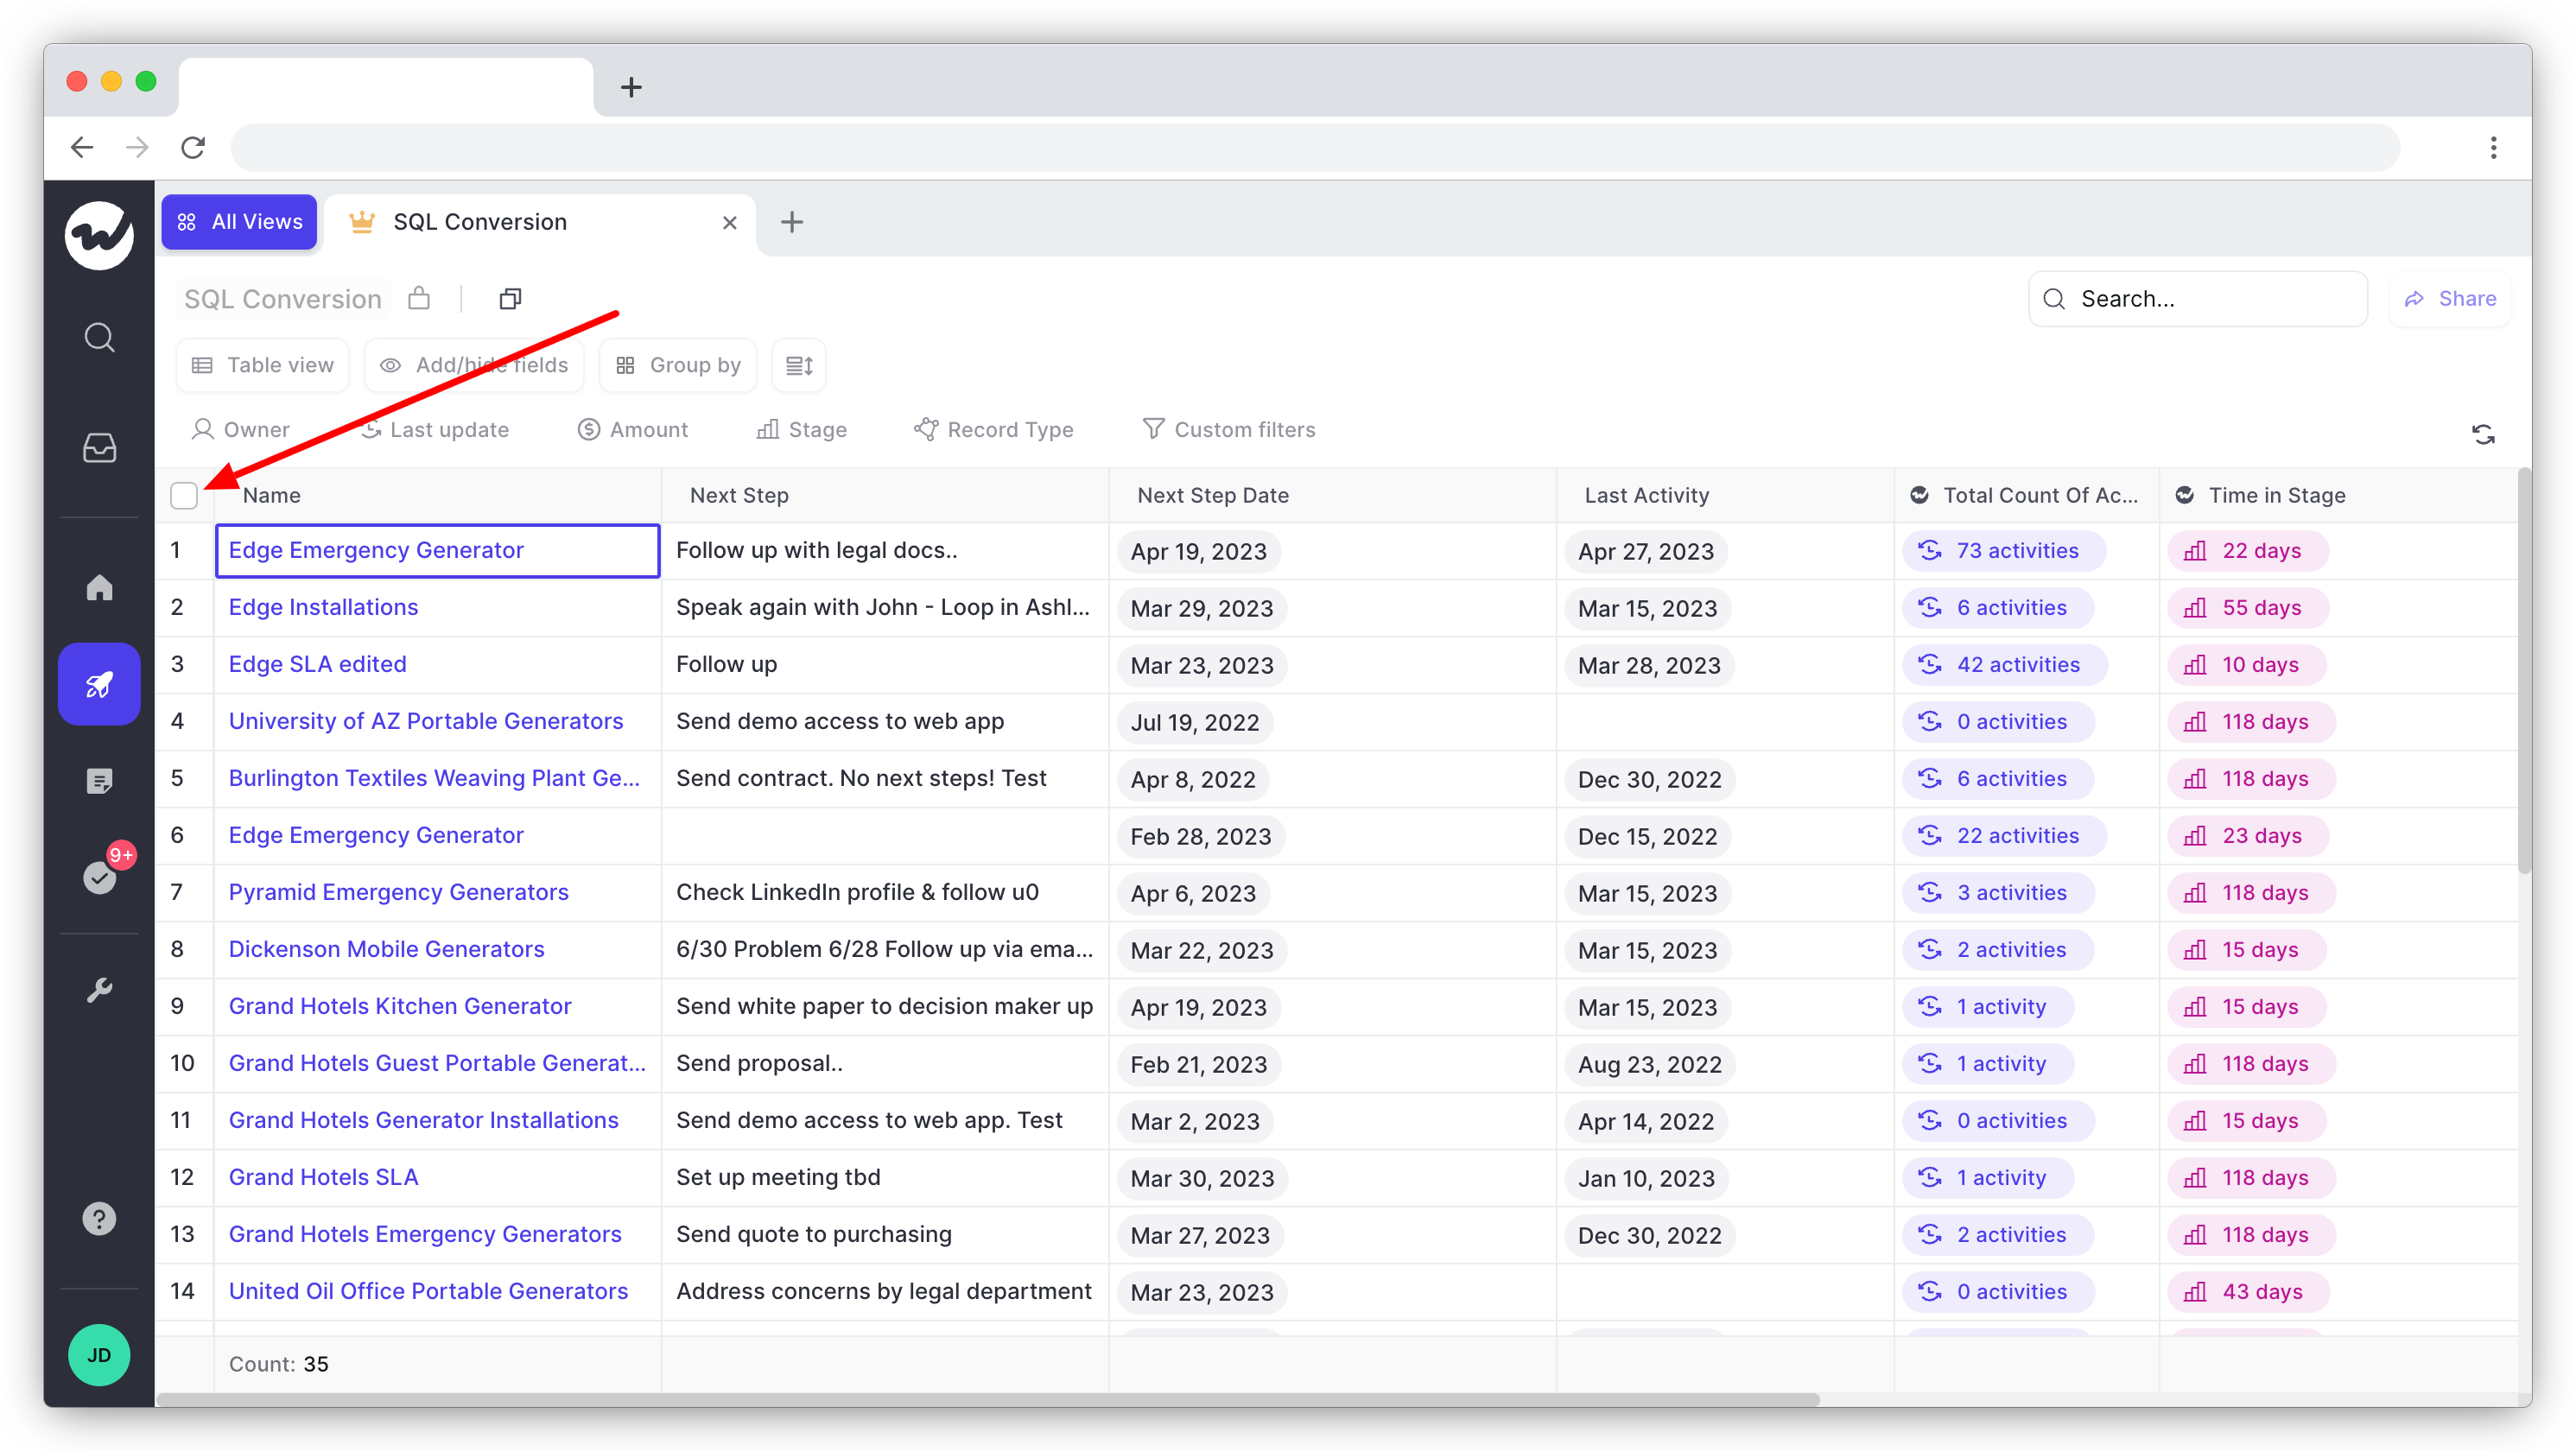
Once you’ve isolated the data you want to update, click the checkbox column to select all the records shown in the view.
Click the Bulk update button.
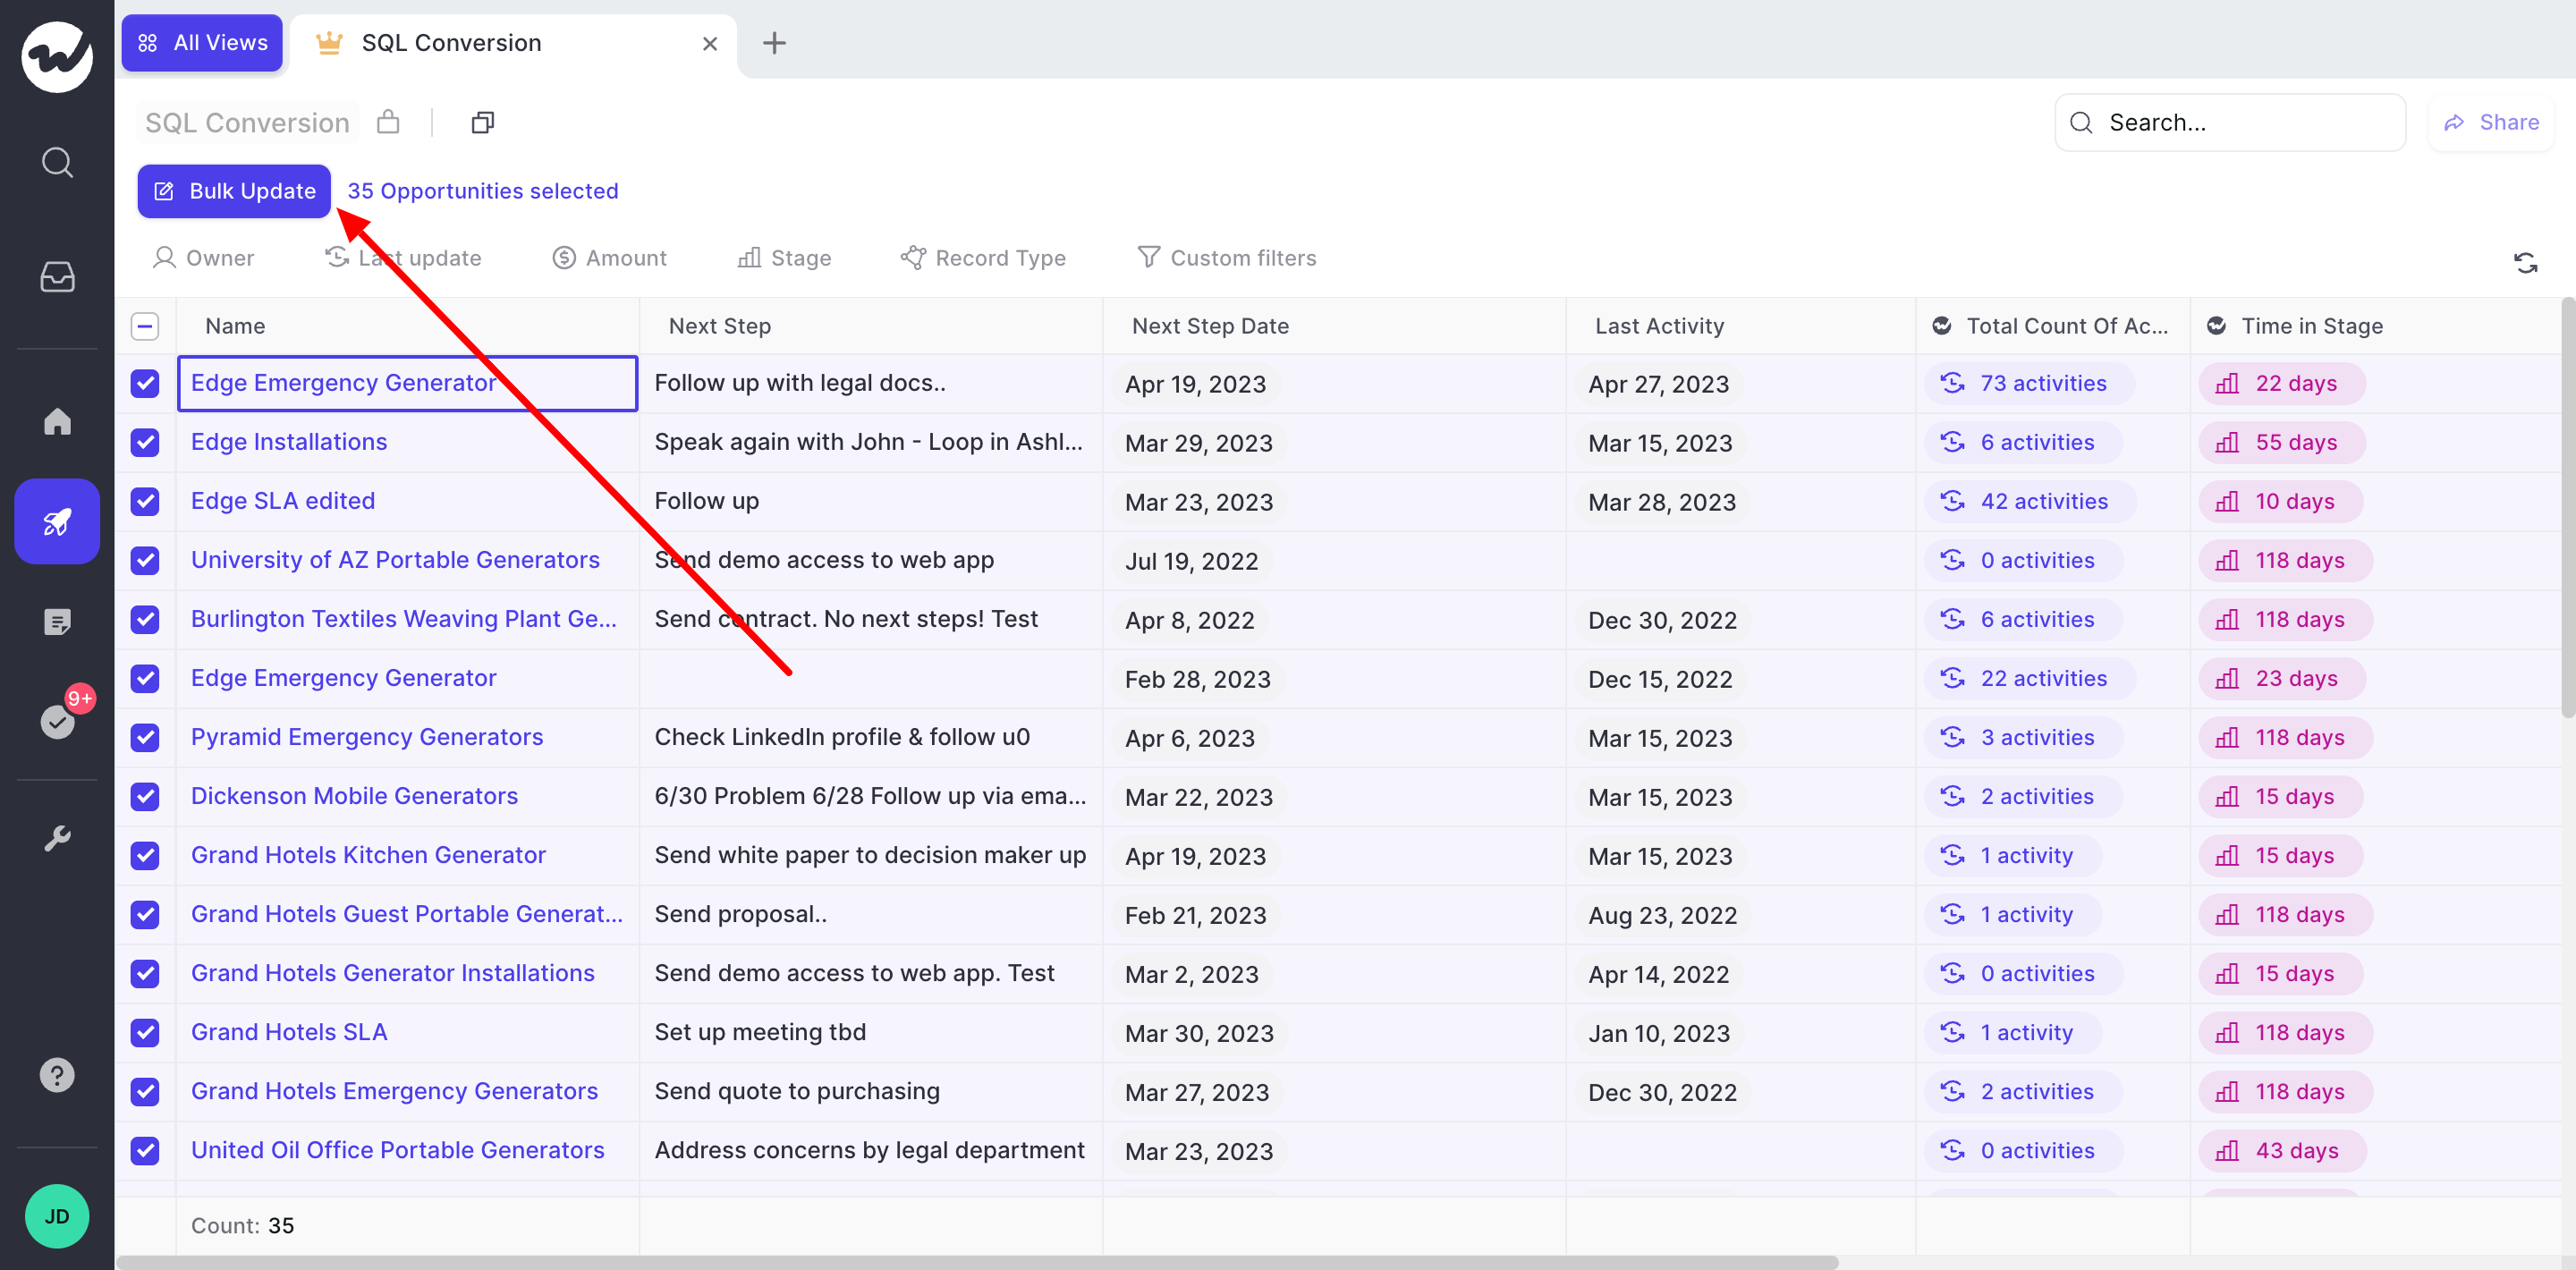
Select the fields you’d like to update and input the appropriate values.
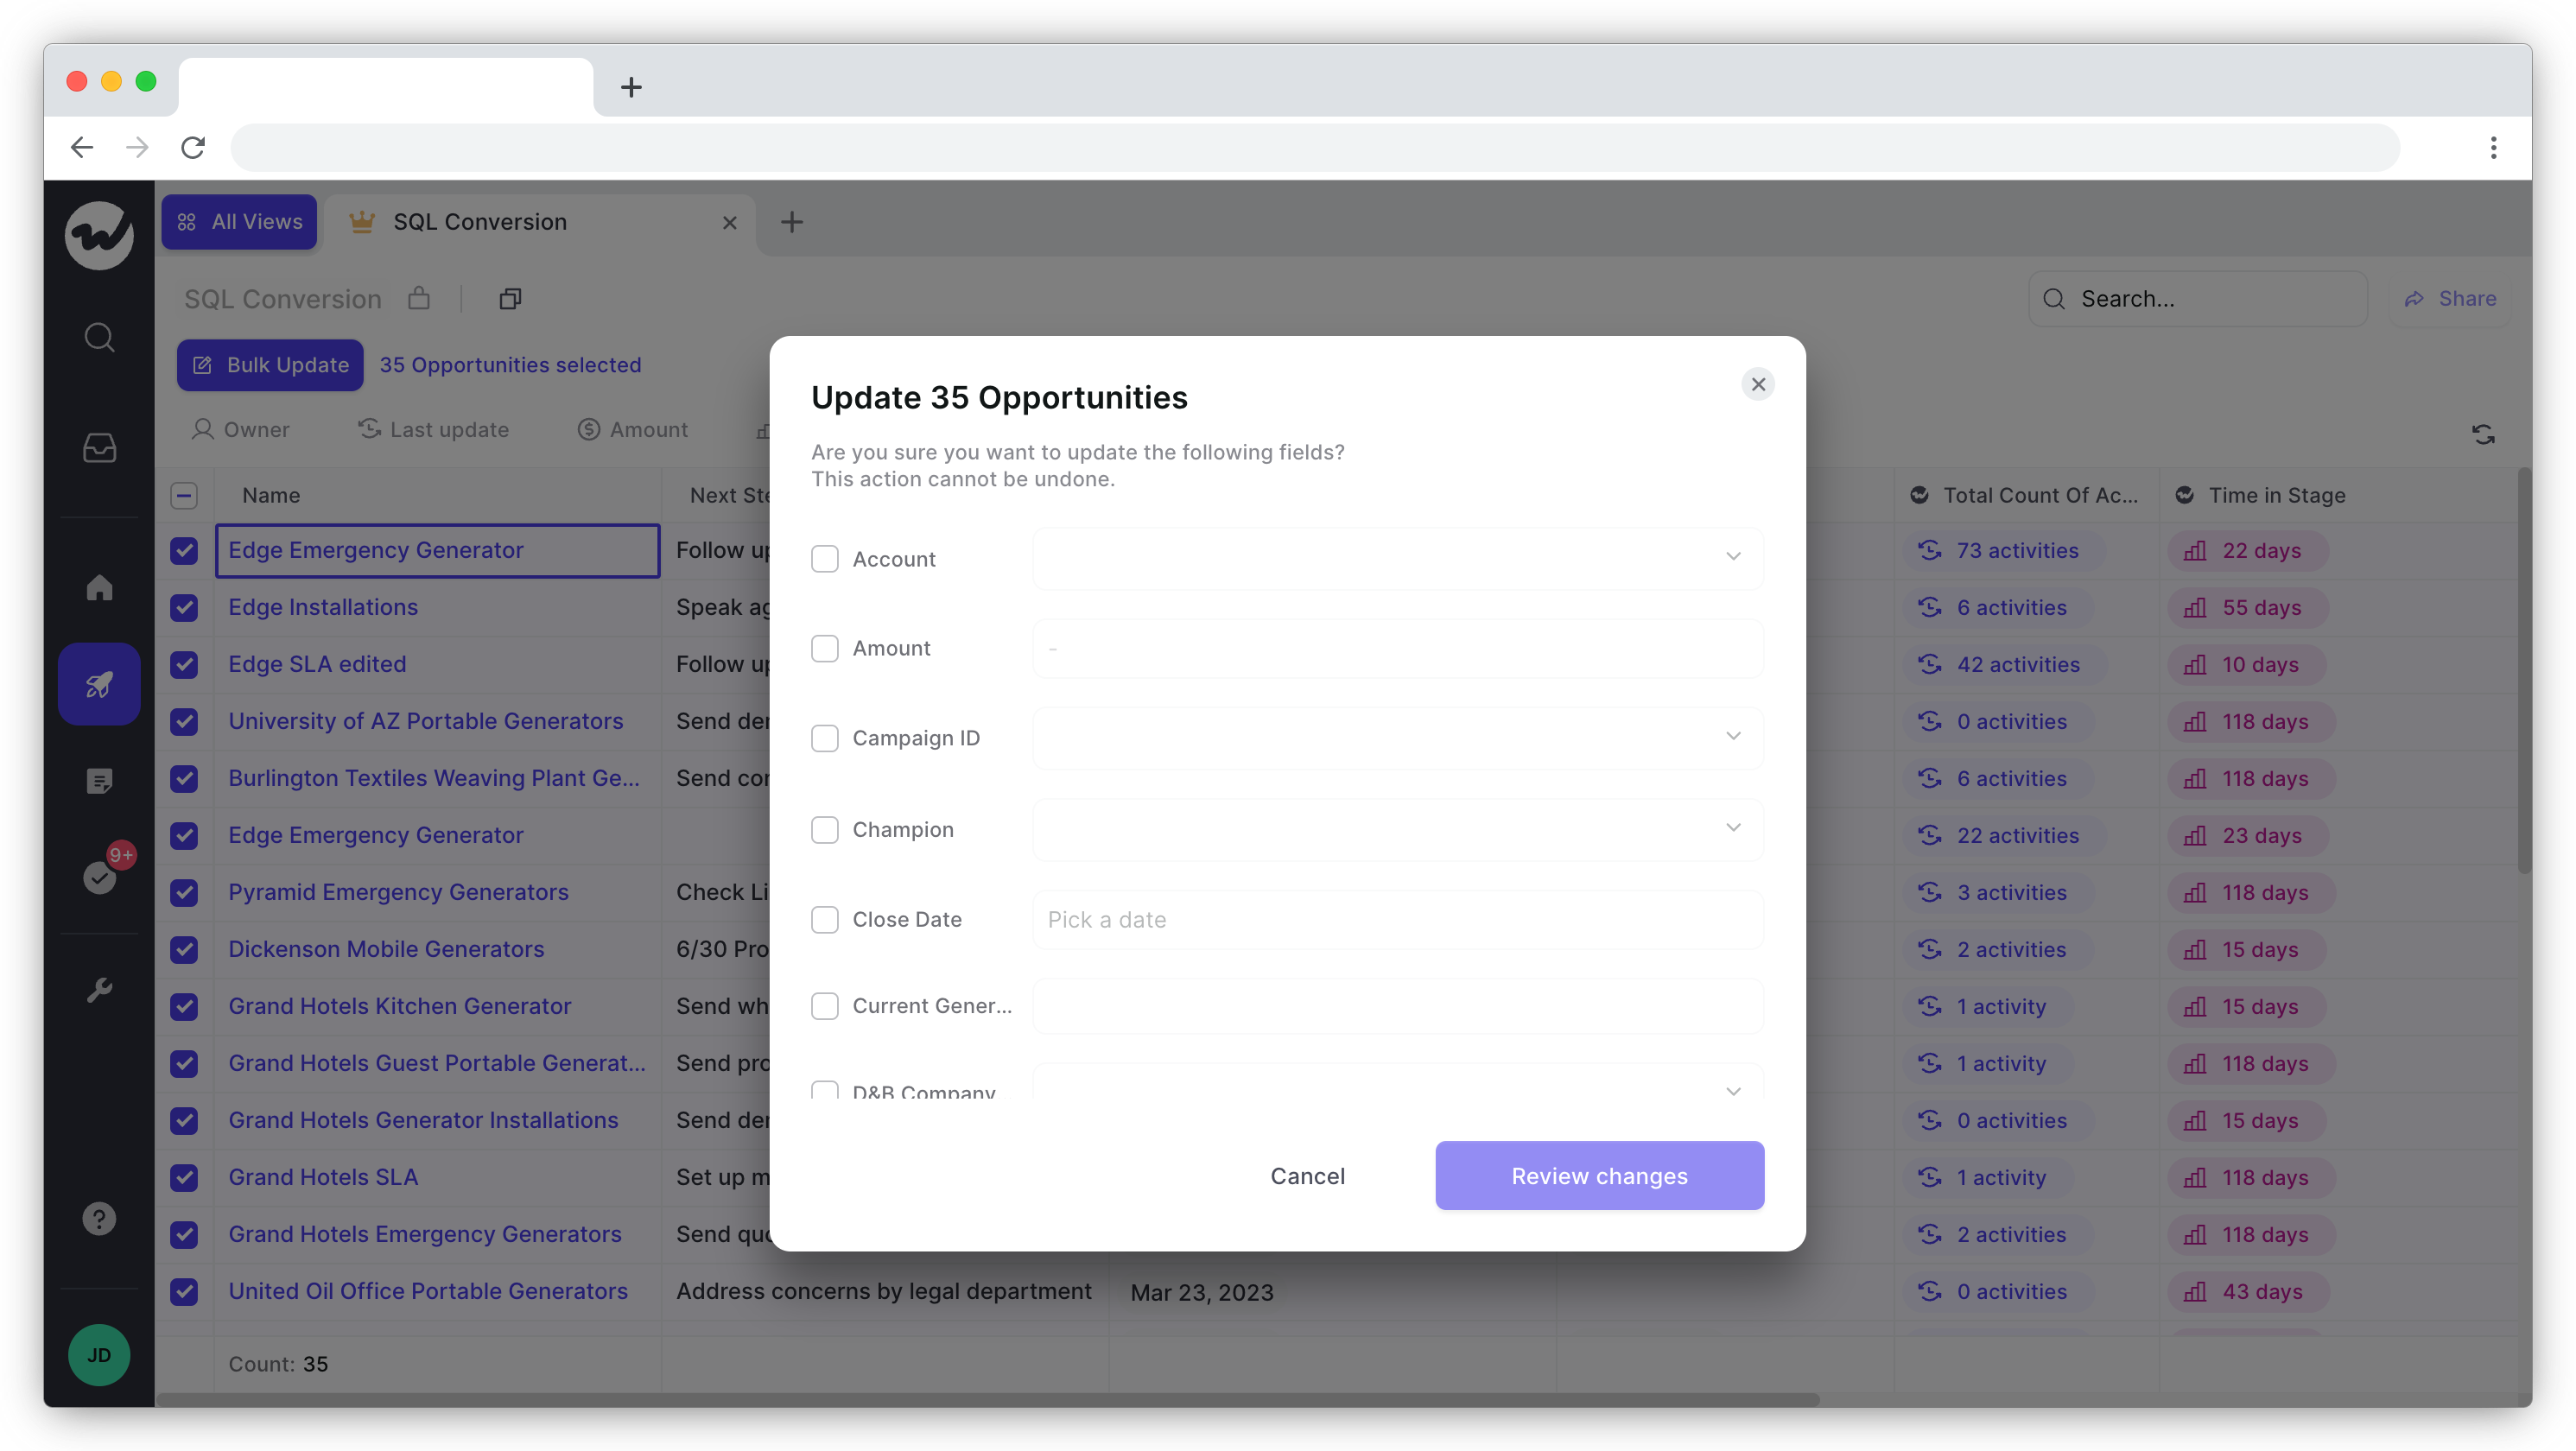
Click Review changes.
Take one final look to ensure everything looks good. Finally, click the Update button.
That’s it! You’ve updated your Salesforce records in bulk.
Wrap up
If you’ve reached this far, you already know that there are multiple ways to mass update records in Salesforce.
Now, it’s time to take action. Pick a method from the three listed above and get your Salesforce records in order.